Showing posts with label Quilting. Show all posts

Friday, June 6, 2014

Hands 2 Help Charity Quilt Complete!

Hello everyone! I know it has been a really long time since my last post - over two months! I have been very busy with work and trying to keep on top of household chores so I haven't had much time at all for sewing. I guess I'm still getting used to balancing leaving the house by 8:00am and getting home at 7:00pm but still having the energy to do something creative. I signed up to make this quilt for the Hands 2 Help Charity Quilt Drive the day before I started working, so I didn't know how exhausted I would be at the end of each day.


That being said, I am really glad that I pulled through and finished this quilt. I chose an easy pattern that I knew I would be able to finish, and actually this only took me a weekend to complete. It was really nice to get back into my sewing room, and I'm happy that my weekend efforts might bring a little happiness to someone who is going through more troubles than just trying to balance their work life with sewing time. Sometimes I take it for granted just how good my life is. 


This quilt will be going to the Quilts of Compassion charity which helps people dealing with disasters in their communities. I have never had to go through a natural disaster, but they seem to happen all the time now. I'm glad that this quilt might help make that ordeal a little easier for someone. 


All finished up it is 60" square. That seems to be my favorite size of quilt. It's great for cuddling if you're an adult and you can really tuck in a child with that size too. I also thought the pattern and colors would be OK for an adult or child as well since it's not too grown up but not too childish either. I did a different type of quilting in each of the colors and then a large stipple in the background. For the backing I used a fun teal print that kind of looks like dandelion flowers once they've turned to the white seeds. 


Anyway, thank you all for stopping in. I hope I keep finding time in my schedule to be able to complete quilts for charity. I have so much in this world, so it is important to me that I give some of that back while I am able. Have a wonderful weekend everyone, and happy quilting!

Wednesday, April 2, 2014

Auction Quilt Finished

Hello everyone! I stayed up way past my bed time last night finishing this up. I needed to turn it in this morning so I was scrambling around at the last minute. My new job has left me with a whole lot less quilting time than I had a few weeks ago. 

Anyway, here's how it turned out:


I really, really loved this quilt. It was so soft, probably the softest quilt I've ever made. I think it was because the pieces were really large so there weren't that many seams to make the quilt stiffer. 


I backed the quilt with an orange floral print. I love the juxtaposition of the orange and blue. It's one of my favorite color combinations. The orange binding gives you just a pop of that complimentary color on the front and then nicely frames the back. I really love it and am kinda sad it won't be staying with me. 


I did straight line quilting on the whole quilt. It was a pretty easy quilt job compared to some other free motion stuff I've done. Other than working through the night, it was very relaxing. 


I didn't want to put a fabric label on the quilt since I'm not sure who will bid on it and actually end up with it. They might not even know who I am since I don't know everyone at the school (in case you missed it before, I'm donating the quilt to a silent auction where the proceeds go toward our church's grade school). So, I made a little paper tag instead and pinned it to the quilt. 


Anyway, I love how it turned out and I hope it makes it's way to someone else's house that will love it just as much. Now to plan my next charity quilt...

Tuesday, March 4, 2014

Flying South Baby Quilt

Hello everyone! So I'm a bit behind in making my friend Jason a baby quilt considering his son is a couple months old already... I had planned on making this quilt:


I bought the magazine so I had the pattern. I went out and bought all the fabric since my brown and green selection is very slim. I washed all the fabric. And then I let it all sit. And sit. And sit. I just couldn't get motivated to do this project and I realized I just hated the pattern. Yes, it is adorable and I would love to have this quilt. But making it is another story. It seemed tedious and just completely un-fun. 

I was watching tv one night and doodling on some graph paper when I came up with a quilt that I did want to make. I looked at it and thought, "that's what I'm doing for the baby quilt!" 

I ironed all the fabric this morning and got to cutting. I just used the greens that I had bought and some white for the background. I put these together:


I love how easy the "no waste" flying geese method is. One large 7 1/4" square for the center and four 3 7/8" background squares give you four geese blocks measuring 6" x 3". Once I got these put together I cut the remaining background pieces and before I knew it the quilt top was completely done!


This is a lot of negative space for me. A lot. I've never had this much before and it's kinda freaking me out a bit. I think that I'm going to just straight line quilt this with some diagonal lines in white, but it will be so noticeable in that negative space. Now I'm thinking that I should have just made the whole top out of flying geese and no negative space to make the quilting easier. But... I looooove this quilt top and the look of it. So, I guess soon I will be getting over my fear of negative space. :) 

Stay tuned!


Monday, March 3, 2014

Auction Quilt Flimsy

Hello everyone! I've got my flimsy finished for the auction quilt I'm making. I guess I should come up with a better name for it, right?


It is 60" square. I still need to find a backing fabric for it. I'm thinking some type of blue or gray print. And then I think I'll do a scrappy binding with the left over print fabrics from the front. 

 
What would you use for a back?

Thursday, February 13, 2014

Happy Valentine's Day!

Hello everyone, and happy Valentine's Day! I've been furiously working to finish my scrappy valentine quilt and I finished it with 2 hours to go here in Portland, Oregon. I really wanted to finish it before my husband came home from traveling tonight. It is now happily drying in the laundry and I'll be able to wrap him up in it when he gets home. 

So, here se some pics of the quilt. If I remember, I'll try to add some pictures of it after it's dry. 


My cat Leia approves of the final product, even if she did ruffle it a bit as I was taking pictures. She desperately wants to snuggle on it. 


This is the quilting that I did in all of the large white areas. I hashed each area with my walking foot and then added some free motion, free-flowing circles. I was trying not to be too anal with getting them all to be the same size and perfectly shaped. It was bugging me a bit because I really do like things to be perfect. I just wanted them to be more natural as if I was doodling on the quilt. I didn't want this quilt to be too rigid. Luckily I'm not super great at uniformity with the free motion quilting yet, so I think it worked out nicely. ;)


In the smaller white areas I did that same circle design around the edge and left the center empty. In the black and gray star pieces I did some straight quilting from the center out. In the heart I just wanted to keep it simple. It is hard to see, but I just did one large FMQ heart in the middle. 


Lastly, in the red border I did a free motion heart pattern. (Sorry for the indoor picture quality!) I debated doing this in the black border as well, but decided against it. I like it just in the red. :)

So, that's my scrappy valentine quilt! Thanks for stopping by, and I hope you all have a lovely Valentine's Day!

Tuesday, February 11, 2014

Valentine's Flimsy

Hello everyone! Just a quick post to show off my Valentine's quilt flimsy. I put on two borders actually, a mottled red and a black with tiny white polka dots. 


I love this quilt so much! No pun intended... 

I have some interesting ideas on how to quilt it. It will be a combo of straight line and free motion. I don't know if it will look good, but it will be good practice. :) Now I just gotta get it pinned and quilted up!

Thursday, December 12, 2013

Finished Double Irish Chain

I know I promised this a long time ago, but I'm finally getting around to posting pictures of my finished Double Irish Chain quilt. :) We've been using it for a while now so I figure I should show it off!

Here it is all happy on our bed. :)


We love it! I backed it with a really soft cotton bed sheet. It was the easiest back I've ever used. I used a king size sheet for this queen size quilt. That gave me plenty of room for excess around the edges for quilting. And, it was only $15 at Target since it was on sale! What a steal for a quilt back. 

I love how the quilting makes it puff. You can see the stitches a lot better on the back. 


I wasn't always perfect with my lines, as you can see... I used a plate to mark the quilt on the front side. It worked well but I always have trouble following a line when I'm quilting. I do much better free-hand. 

And of course while I was taking pictures my cat Sasha had to help out. 


There she is as a lump under the quilt. Even she likes to crawl underneath!


And here she is all exposed. It's been cold here so we have several blankets on the bed. Of course we have the prettiest on top. :)

I have been doing some other sewing lately, but can't show it until after we've celebrated Christmas. I'll be back with an update after that for sure! Hope you're all enjoying the shift into winter. Happy sewing!

Monday, November 25, 2013

November Happenings

Hi everyone! Sorry I've been gone for so long! We've had a lot of visitors over the past month and I haven't had much time for sewing. I thought I'd check in before we all get swept away into Thanksgiving and show you the two small things I've completed this month. 

First up was my Color Bee Shocked bee block for October. Yes, I said October. I know, I know I became one of those people. I never meant to get behind, but it just happened and I don't know how to explain it. I felt really guilty about it so I included some extra goodies along with my block and apology note. I've made a pact with myself never to let that happen again! Anyway, here's my block:


It's called X Marks the Spot and uses a bunch of HSTs. It was actually pretty fun to put together, so I shouldn't have waited so long to do it!

My other November project I just put together today. It's a laptop sleeve for my new computer. 


I had a bunch of 2.5 inch squares left over from my double Irish chain quilt, so I decided to put some of them to good use. I just sewed them up corner to corner and cut off the excess. That way I wouldn't have to trim up all of those HST corners. 

For the layout, I wanted something more modern (I had thought about doing a simple pinwheel pattern, but it just didn't seem cool enough). So, I played around with turning the HSTs left and right and came up with this broken square design. It's more modern than I usually go, and it's growing on me. :) 

Speaking of modern, I did get to go to my first Portland Modern Quilt Guild meeting this past week! It was a lot of fun and I got to put a face to an online quilting friend. Thanks for coming with me, Kathy! Hopefully we'll be able to attend their holiday meeting in a couple weeks once they nail down the date, time and location. Until then I'll try my best to get some more sewing time in!

Happy Thanksgiving and happy sewing everyone!

Monday, September 30, 2013

Butterfly Baby Quilt

Hi everyone! I bet I'm in the same boat as everyone else when I say I can't believe it's the last day of September already! Summer sure went by fast.

As a quick update here today I finished my butterfly baby quilt top. It measures 38" wide by 40" long. If you missed it, you can see my butterfly quilt block tutorial here.


Now I just need to find some fabric for the back, quilt it, and bind it. I'm thinking I might try to sell this one as I have no need for a baby quilt right now. Otherwise I might hang it as a wall-hanging quilt in my sewing room. Hmmm, decisions decisions! :)

Anyway, hope you're all having a great start to your week. Now, on to October! :)

Monday, September 9, 2013

Butterfly Block with Tutorial

Hello everyone! I hope you're all doing well. I wanted to share this butterfly block that I came up with last night. I thought it was pretty cute, so I made one, then two, and then decided to finally take pictures and do a tutorial with the third one. :) I hope you enjoy this block, and if you make one I'd love to see the finished product!

So, here are the directions and what you'll need to make your very own butterfly:


You'll need 4 different shades of fabric:

Background fabric
Body fabric
Top wing fabric
Bottom wing fabric

From the background fabric cut:
(1) 10.5" x 2.5" rectangle
(10) 1.25" squares
(6) 2.5" squares


From the body fabric cut (1) 10.5" x 2.5" rectangle


From the top wing fabric cut (2) 6.5" x 4.5" rectangles


From the bottom wing fabric cut:
(2) 4.5" squares
(2) 2.5" squares


To assemble the body, take (4) 1.25" background squares and the body rectangle piece. Lay a background square on each corner of the body piece. The background squares will not overlap, they will just meet in the middle of the rectangle.


Now, one at a time, sew diagonally from corner to corner on each of the background squares. You can mark a line on the back of each one and sew on the line if you want to, but I didn't do that for any of my corner squares for this block. They are small enough to be manageable by hand without moving too much. Pinning usually helps me more than a line across the block.


Once all four corner squares are sewn on, set this piece aside.

To assemble the top wings you'll need the 2 top wing pieces, (4) background 2.5" squares, (2) background 1.25" squares and both of the bottom wing 2.5" squares. Lay out the pieces like this:


The pieces will be a mirror image of each other so that the wings are symmetrical. 

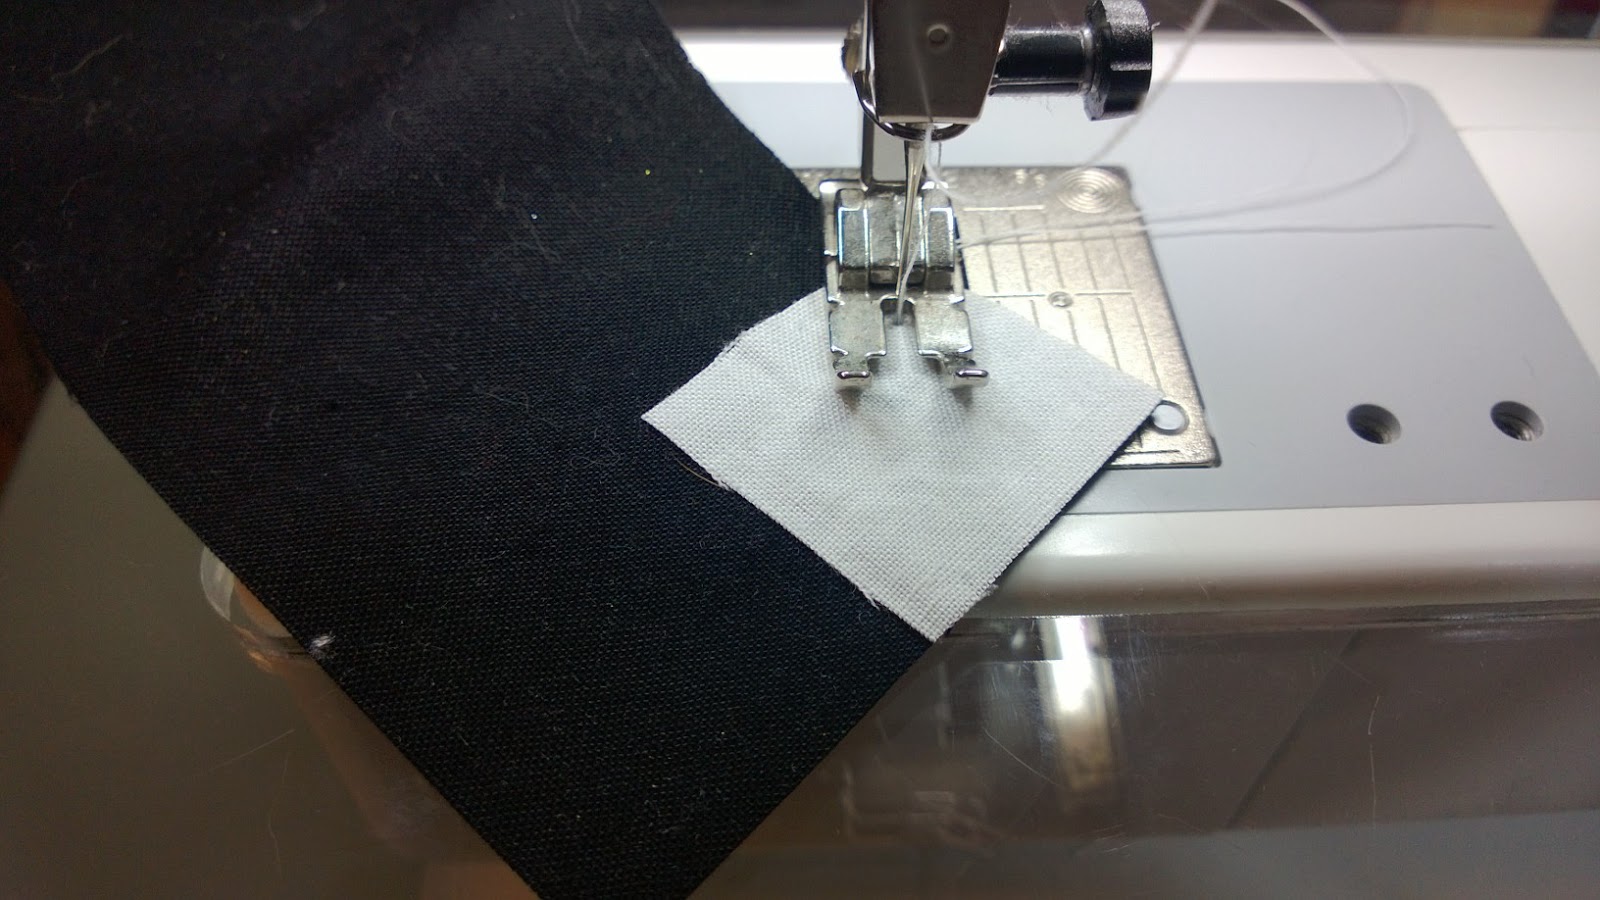
Starting with the bottom wing squares, sew diagonally across the small square (right sides together) to attach that piece to the top wing piece.


Trim 1/4" away from the line you just sewed:


Press toward the bottom wing pieces.


Now sew on the rest of the background squares in the same manner. The large one on the bottom with the bottom wing square will overlap the bottom wing piece. Set the top wing pieces aside for trimming and pressing later.

To assemble the bottom wings you'll need both bottom wing 4.5" squares, (2) 2.5" background squares and (4) 1.25" background squares. Lay out your pieces like this:


Sew them together one at a time on the diagonal to attach the background squares to the bottom wing pieces. 

Now, take all of your pieces and trim each corner square you sewed on, 1/4" away from the seam. Your pieces should look like this now:


Now you're ready to press your seams. For the body piece, press toward the background squares. For the top wings, press the top two corner squares toward the large wing piece and press the bottom two corner squares away from the large wing piece. For the bottom wings press all of the corner squares toward the wing piece. Your seams should look like this:


Pressing in this manner will make your seams nest for the next steps in sewing the block all the way together.

Now, sew each top wing to each bottom wing. The corner square seams will nest giving you really crisp points. I usually pin in the middle by the nesting seams and near the end.


To make your points match up perfectly your stitch line should intersect the corner square seams where they cross. Like this:


Now, press the wings. I pressed toward the bottom wing since the top already had a lot of seams. You could press the seams open though.


Now sew your wings to your body. The bottom corner squares on the bottom wing will nest with the corner squares on the bottom of the body piece. I started pinning here, then pinned the top end and then pinned each seam in the middle. Press the seams toward the body piece (or again you can press them open if you wish).


Now, take your last remaining background rectangle (10.5" x 2.5") and sew this to the top of the butterfly, pinning in place. Press toward the background rectangle.

The last thing you have to do is embroider your antennae. I drew mine on with a washable pen. 


Then embroider and pressed the block one last time.


And that's it! :) Now you have a beautiful butterfly. But, he needs a few friends, so this is what he looks like with some others:


I'm planning on making 9 of these into a baby quilt. The outside columns will be flying north and the middle column will be flying south. I also plan to add a 2.5" sashing between the columns to give it a little more width and then border the whole thing out in 2.5" background fabric. 

I found this pattern is great for scraps. I didn't really cut into my stash at all except for the background white pieces. A black and white jelly roll would also work well since the background pieces and the body pieces can easily be cut from the 2.5 inch strips. Anywho - thanks for reading all the way to the end and happy crafting!

Tuesday, August 20, 2013

Swimming in WiPs!


Hello everyone! I've been waiting for a microwave installer guy to show up all afternoon. Since I couldn't leave the house, I had a lot of time to get some sewing and crafting done!

I have several WiPs in the wings that I've been working on. First up is my beach quilt - Bits and Pieces. I had enough to put a 5 inch scrappy border all around it. So, the top is now done. I plan to bind it in black so it will have a skinny border around all of the color to finish it off.


The border looks a little more pastel than it is in real life. Too bad I didn't have any more red or pink from the middle fabrics to use, but I just barely had enough of the other ones to pretty much make it all the way around.

For quilting I think I'm going to do a loopy all over patter in the middle, then do hearts in the black border. I'm not sure what I'm going to do in the scrappy border, maybe just some free-form wavy lines since it will primarily be used at the beach. Maybe I should be really brave and add some feathers to those wavy lines! *Gulp!* I've never done feathers before...

My second project of the day was finishing up some Christmas stockings for my husband and I.


I know it's way far out from Christmas, but these have been on my to-do list since last November. Obviously I fell short from making them last year, so I decided I'd finish them up super early this year. :)


I really love the texture that the diamond quilting gives the stockings. I still need to run them through the wash to get rid of my quilting lines, but I have a few months to do that. ;) Otherwise, they are good to go!

Third, I started a new scarf! The pattern is called Falling Water and it is a free Ravelry download. I had forgotten all about Ravelry until a couple days ago. Then I rediscovered how much time you can really lose while scanning through everything on that site. I decided I should put some of my browsing time to good use and start one of the patterns I had saved months ago.


I really like how it is turning out so far, despite a couple ssk difficulties. :)

Otherwise, I still have a few other quilts on the to-do list that have been hanging out there for.... almost forever (or for a very long time at least)!

The Double Irish Chain:


These squares have been cut for 2(!!) years now and I still haven't done anything with them. I think this one really needs to be the next one on my get-it-done list.

The Fall Leaf Quilt:


I still have over half of the leaves to put together for this one. Again, I have everything cut and ready to go, just need to do the sewing! I think this is number 2 on the list. :) Or maybe number 1... we'll see if I get motivated enough to work on the Double Irish Chain quilt...

The embroidery project/quilt:


I have 5 out of 12 patterns done and I'm working on the 6th. So, Germany, Egypt, France, Italy and Russia are done. Mexico is in the works, and I still have to do China, Japan, India, USA, United Kingdom and Australia. I plan to border these squares out with the colors of each country's flag and then sew them up into a little travel themed quilt.This one isn't a huge rush, just a guilty pleasure project. :)

The Quilty Barn-a-long:


I have 8 out of 12 barns done. I know I'm a few behind. I also want to make a couple more of my tractors before I sash these and sew them up into a top. Again, this is another guilty pleasure project, but I'd like to finish it up sometime soon...

Lastly, it is my month for our quilting bee - Color Bee Shocked. So, I've been getting a lot of Irish Twist blocks back in the mail. Once I get them all back I want to put this one together quickly. I don't want it to sit in my closet for a couple years until I get to it. 


I'm really looking forward to seeing all of the blocks together! :)

So, that's what I'm working on/not working on these days... How about you?
Related Posts Plugin for WordPress, Blogger...