Tuesday, October 22, 2013

Wicked Wicked Wicked

Hello everyone! If you are here for the first time, welcome! If you're a follower, then welcome back! :) Do you like my picture? I couldn't resist putting up a shot of the creepy spiders that are all over my house and garden. I just wanted to set the mood for this wicked day! :)

I'd like to thank Wendy and Mdm Samm for hosting and cheering on this hop. I have the privilege of sharing my day with these lovely ladies:

The Recipe Bunny (you are here!!)

Please stop by and visit these ladies today too. We hope you enjoy the hop!

Last year I created a couple table toppers for the Wicked hop, so this year I wanted to make something to adorn my wall. My husband and I moved to Portland this year and so I have new walls to decorate this Halloween season. I decided to put this together for you all today:


It's a spooky graveyard scene on a night with a blazing full moon. I would not want to be stuck there at night!

This wall hanging was a lot more work than I had originally anticipated. Here's a look at my planning sheet:


Yikes! So many tiny pieces! Here's a close up of one of the spots with those little pieces (1" HSTs!):


I will confess it was murder trying to get all of my points to turn out, and I wasn't completely successful. But, that's just fine since this little quilt is staying with me! Here are a couple other "in progress" pictures that I took for you guys.

Top Complete
Embroidery
So, I hope you liked my little project! Please remember to stop by the other blogs today for more Wicked projects and fun! I hope you come back to see me again soon! Happy Halloween!

Wednesday, October 16, 2013

Upcycled Skirt

Hello everyone! I've been seeing pictures of upcycled skirts all over Pinterest lately, and I've been wanting to give it a try. Unfortunately, I'm not much of an apparel sewer. I usually just stick to quilts, hot pad holders, table runners, you know, things I don't have to wear in public! If I screw up on a quilt no one will really notice it but me. However, if my butt is hanging out of a skirt, several people are going to notice that!

So, today I faced my fears and got to it! I went to Goodwill to find a cheap men's shirt. I actually found two that I liked, but I started with this one($6!!!):


I cut just below the arm seams and then cut the bottom to be straight across. Gotta love that rotary cutter!

Then, I turned it into this:


!!! It actually worked! There were a few hiccups along the way as to be expected. (Sorry for the bathroom pics, but I don't have a full length mirror!) I'm so pleased with how it came out. I didn't take pictures of the process because I wasn't sure I would even like it, or that it would fit. I did add a tie in the back, so here are some more pictures:


I think it is quite cute. And, now I just need to get some brown tights to go with it and I'll be ready for fall! Thanks for indulging me in my new craft!! :) Happy crafting!

Tuesday, October 15, 2013

Butterfly Baby Quilt Finished

Hello everyone!

I have finished my butterfly quilt and wanted to show it off to you all. All finished it is 38 x 40 inches and I love it!


I used all free motion quilting on this one. I did a squiggle in each butterfly in coordinating thread. In the sashing I did a heart motif and also used that in the borders. Here's a close up of the quilting:


For the back I used this super cute argyle print. I still have some more left so I can use it on some more projects.


So, I have decided to sell this little quilt and have opened an Etsy shop. I don't have much in there right now, just this quilt and some blank note cards that I put together. If you want to check it out, you can see my shop here. It's called CraftieBunny. Hopefully I can start making more things to put in there. :)

I've also finished my Double Irish Chain Quilt, but I'll save that for another post. It is enjoying itself on our bed for now. Anyway, what have you all been up to?

Tuesday, October 1, 2013

Gobble Gobble

Hello everyone! I know, I know it's the first day of October, but I couldn't help myself from completing a little November project instead. It has been very windy and chilly here which reminds me more of November from Wisconsin rather than October. Even though I live in Portland now I guess I have been channeling the fall season stuff from Wisconsin. :)

I have been spending a lot of time in my sewing room lately (with the completion of my Double Irish Chain top and the Butterfly Baby Quilt top), and I wanted something I could do while being in the living room with my husband. So, I got to drawing and designed this little turkey cross stitch.


I just love how plump he is. :) I think I'm going to make him into a card. I just need to get some larger card stock so I can make an aperture opening card and then I'll be good to go. I still have some more cross stitch fabric, maybe I should make something for Halloween (or Christmas already???)... :) Happy crafting everyone!

Monday, September 30, 2013

Butterfly Baby Quilt

Hi everyone! I bet I'm in the same boat as everyone else when I say I can't believe it's the last day of September already! Summer sure went by fast.

As a quick update here today I finished my butterfly baby quilt top. It measures 38" wide by 40" long. If you missed it, you can see my butterfly quilt block tutorial here.


Now I just need to find some fabric for the back, quilt it, and bind it. I'm thinking I might try to sell this one as I have no need for a baby quilt right now. Otherwise I might hang it as a wall-hanging quilt in my sewing room. Hmmm, decisions decisions! :)

Anyway, hope you're all having a great start to your week. Now, on to October! :)

Saturday, September 28, 2013

Double Irish Chain Top

Hi everyone! I hope you're all enjoying the transition into fall. It's a blustery 65 degrees here (55 yesterday) so I'm enjoying snuggling up in all of my warm quilts! :)

I have been really busy this month. At the beginning of the month I talked about wanting to work on my Double Irish Chain quilt. I've had this one in the works for 3 years now. I had all of the pieces cut out, but none of the 81 blocks completed. So, I set out to get the top done this month and I've succeeded!


It measures 96 inches square with the border. Each block was 10 inches (finished) and I added a 3 inch (finished) border all around. This is definitely big enough for our bed. Here's a pic of it on the bed before the border was added:


This is going to be the largest quilt I've ever made. My Super Mario Quilt was longer (105 inches), but it was only 75 inches wide. This one will be just as hard to maneuver though. I need to get backing fabric for this yet. I'm not sure what I want to go with. I'm thinking a dark green would be nice since there's so much light green in the top.


I wasn't quite sure about the light blue print when I started putting all of the blocks together. It's still not my favorite, but it's growing on me. I didn't want to go out and buy a different fabric since it was already cut up into the squares.

So, any suggestions on how I should quilt this beast? All over pattern? Something specific in each colored section? Border treatment? An all over stipple would be the easiest and wouldn't take too long. I could also do straight line quilting to play up the diamond effect of the quilt. That might actually be even easier. Hmmm... what do you think?

Monday, September 9, 2013

Butterfly Block with Tutorial

Hello everyone! I hope you're all doing well. I wanted to share this butterfly block that I came up with last night. I thought it was pretty cute, so I made one, then two, and then decided to finally take pictures and do a tutorial with the third one. :) I hope you enjoy this block, and if you make one I'd love to see the finished product!

So, here are the directions and what you'll need to make your very own butterfly:


You'll need 4 different shades of fabric:

Background fabric
Body fabric
Top wing fabric
Bottom wing fabric

From the background fabric cut:
(1) 10.5" x 2.5" rectangle
(10) 1.25" squares
(6) 2.5" squares


From the body fabric cut (1) 10.5" x 2.5" rectangle


From the top wing fabric cut (2) 6.5" x 4.5" rectangles


From the bottom wing fabric cut:
(2) 4.5" squares
(2) 2.5" squares


To assemble the body, take (4) 1.25" background squares and the body rectangle piece. Lay a background square on each corner of the body piece. The background squares will not overlap, they will just meet in the middle of the rectangle.


Now, one at a time, sew diagonally from corner to corner on each of the background squares. You can mark a line on the back of each one and sew on the line if you want to, but I didn't do that for any of my corner squares for this block. They are small enough to be manageable by hand without moving too much. Pinning usually helps me more than a line across the block.


Once all four corner squares are sewn on, set this piece aside.

To assemble the top wings you'll need the 2 top wing pieces, (4) background 2.5" squares, (2) background 1.25" squares and both of the bottom wing 2.5" squares. Lay out the pieces like this:


The pieces will be a mirror image of each other so that the wings are symmetrical. 

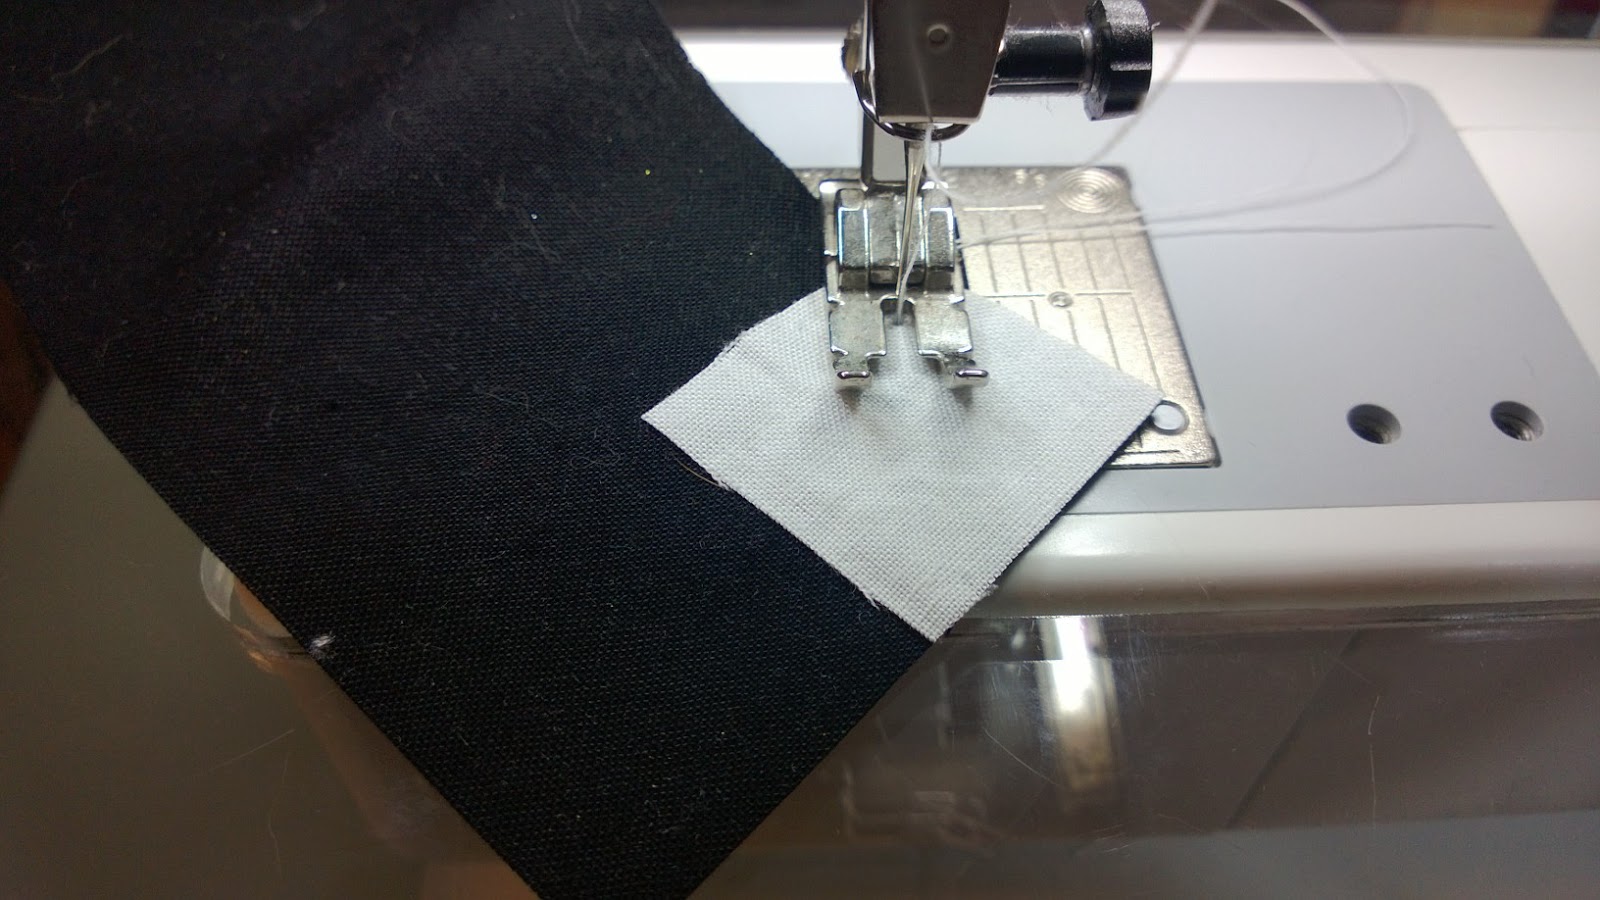
Starting with the bottom wing squares, sew diagonally across the small square (right sides together) to attach that piece to the top wing piece.


Trim 1/4" away from the line you just sewed:


Press toward the bottom wing pieces.


Now sew on the rest of the background squares in the same manner. The large one on the bottom with the bottom wing square will overlap the bottom wing piece. Set the top wing pieces aside for trimming and pressing later.

To assemble the bottom wings you'll need both bottom wing 4.5" squares, (2) 2.5" background squares and (4) 1.25" background squares. Lay out your pieces like this:


Sew them together one at a time on the diagonal to attach the background squares to the bottom wing pieces. 

Now, take all of your pieces and trim each corner square you sewed on, 1/4" away from the seam. Your pieces should look like this now:


Now you're ready to press your seams. For the body piece, press toward the background squares. For the top wings, press the top two corner squares toward the large wing piece and press the bottom two corner squares away from the large wing piece. For the bottom wings press all of the corner squares toward the wing piece. Your seams should look like this:


Pressing in this manner will make your seams nest for the next steps in sewing the block all the way together.

Now, sew each top wing to each bottom wing. The corner square seams will nest giving you really crisp points. I usually pin in the middle by the nesting seams and near the end.


To make your points match up perfectly your stitch line should intersect the corner square seams where they cross. Like this:


Now, press the wings. I pressed toward the bottom wing since the top already had a lot of seams. You could press the seams open though.


Now sew your wings to your body. The bottom corner squares on the bottom wing will nest with the corner squares on the bottom of the body piece. I started pinning here, then pinned the top end and then pinned each seam in the middle. Press the seams toward the body piece (or again you can press them open if you wish).


Now, take your last remaining background rectangle (10.5" x 2.5") and sew this to the top of the butterfly, pinning in place. Press toward the background rectangle.

The last thing you have to do is embroider your antennae. I drew mine on with a washable pen. 


Then embroider and pressed the block one last time.


And that's it! :) Now you have a beautiful butterfly. But, he needs a few friends, so this is what he looks like with some others:


I'm planning on making 9 of these into a baby quilt. The outside columns will be flying north and the middle column will be flying south. I also plan to add a 2.5" sashing between the columns to give it a little more width and then border the whole thing out in 2.5" background fabric. 

I found this pattern is great for scraps. I didn't really cut into my stash at all except for the background white pieces. A black and white jelly roll would also work well since the background pieces and the body pieces can easily be cut from the 2.5 inch strips. Anywho - thanks for reading all the way to the end and happy crafting!
Related Posts Plugin for WordPress, Blogger...