Showing posts with label FMQ. Show all posts

Thursday, February 13, 2014

Happy Valentine's Day!

Hello everyone, and happy Valentine's Day! I've been furiously working to finish my scrappy valentine quilt and I finished it with 2 hours to go here in Portland, Oregon. I really wanted to finish it before my husband came home from traveling tonight. It is now happily drying in the laundry and I'll be able to wrap him up in it when he gets home. 

So, here se some pics of the quilt. If I remember, I'll try to add some pictures of it after it's dry. 


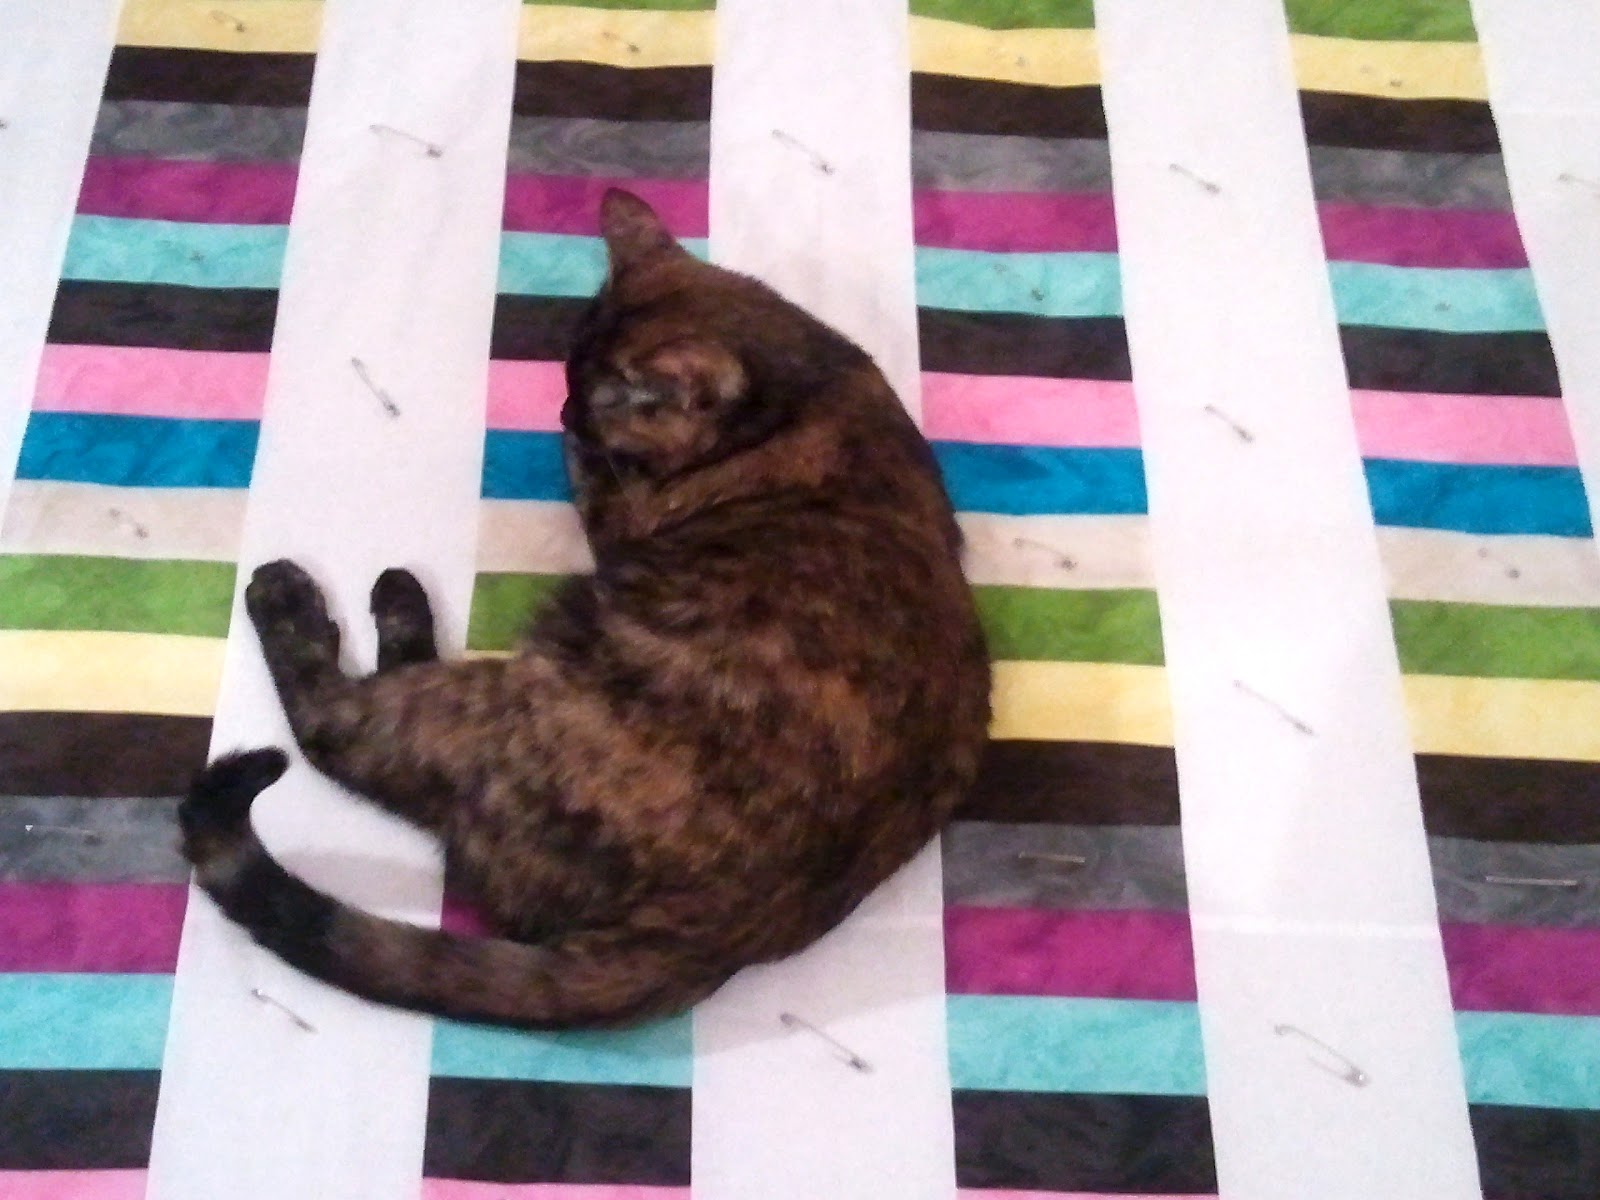
My cat Leia approves of the final product, even if she did ruffle it a bit as I was taking pictures. She desperately wants to snuggle on it. 


This is the quilting that I did in all of the large white areas. I hashed each area with my walking foot and then added some free motion, free-flowing circles. I was trying not to be too anal with getting them all to be the same size and perfectly shaped. It was bugging me a bit because I really do like things to be perfect. I just wanted them to be more natural as if I was doodling on the quilt. I didn't want this quilt to be too rigid. Luckily I'm not super great at uniformity with the free motion quilting yet, so I think it worked out nicely. ;)


In the smaller white areas I did that same circle design around the edge and left the center empty. In the black and gray star pieces I did some straight quilting from the center out. In the heart I just wanted to keep it simple. It is hard to see, but I just did one large FMQ heart in the middle. 


Lastly, in the red border I did a free motion heart pattern. (Sorry for the indoor picture quality!) I debated doing this in the black border as well, but decided against it. I like it just in the red. :)

So, that's my scrappy valentine quilt! Thanks for stopping by, and I hope you all have a lovely Valentine's Day!

Tuesday, September 25, 2012

Dots on Dots Quilt Finished!

Yay, I've got my first September goal finishes! I guess the first one was to sew together all of the blocks from the hop and the second was to finish the quilt.

I did end up putting the left over pieces on the quilt as a scrappy squared border. There's a funny story about how those pieces came to be. (Well, funny now but very frustrating when it happened...)

I was cutting all of my pieces for this quilt, some needed to be pieces to make into half square triangles and others were just going to be regular squares. I cut the HST pieces first because there were more of them, so I needed to cut those to be 2 7/8ths inches square for a finished square of 2 inches. Somehow I had it in my head that my regular squares then needed to be cut to 2 inches square, so of course that's what I started cutting. Much to my horror, I realized as I was cutting the last strip apart into squares and looking at all of the pieces together that I had cut all of the regular squares a half inch too small. I didn't even have enough fabric to re-cut them all either.

I quickly ran to JoAnn Fabrics to see if I could get more of the pink, green and center blue and teal colors. Yes - I had to find more of 6 fabrics! I searched and searched for the teal color that wasn't a batik. I couldn't find it. I looked through all of the fat quarter cuts twice, then went through all of the bolts, nothing. So, I decided maybe I was going to have to find another teal fabric to complete the quilt. So, I looked through all of the bolts again and wasn't finding anything that I really liked or that matched the quilt.

So, I said a little prayer (literally), and went to check the fat quarter cuts one more time before heading home defeated. Lo and behold, I found the fabric I was looking for! I think I actually let out a little squeal in the store I was so elated. It surprises me the power of prayer sometimes, especially because all I needed was a little bit more fabric. So, I happily went home to re-cut those 6 fabric colors into 2 1/2 inch squares. I saved the ill-cut 2 inch squares and figured I'd do something with them.

I started sewing them together into a strip thinking I might use them on the back of the quilt, but when I put it up next to the quilt I realized it was the perfect length for a border on the long sides. I had 4 piles of those 2 inch squares that I made into 4 long strips that became the borders of the quilt. I was pleasantly surprised at how well the whole situation turned out! Thank you Lord for having a plan for my mistake!

I made the back scrappy out of the left over polka dot prints I had from the quilt. I haven't had much practice making a pieced backing before and I had a couple puckering issues on the backside while I was free-motion quilting this. Those weren't fun to rip out, but at least I caught them before they were huge issues There's still one little bubble on the back where I couldn't quite ease the back into the FMQ, but it's not too bad. I notice it, but I'm not sure my husband would notice it if I hadn't pointed it out. (That's my story and I'm sticking to it!)

For the FMQ pattern I did a spiky swirl design. I got the idea from Bea who did something similar on her latest quilt. Mine didn't turn out as beautiful as hers, but this is the first time I've done a swirly pattern. I've done loop-de-loops and stippling, but this one was different. I really like how free you can be with FMQ. Straight lines look really crisp and clean, but FMQ is just so much fun! I'm not sure I ever want to go back, haha! Anyway, that's my finished dots quilt. I hope you've enjoyed seeing it come together. :) On to the next project! Happy crafting!

Monday, July 23, 2012

Beach Jelly Roll Quilt

Woohoo! I've finished another quilt! This is the most quilting I've done in years! :) I made this striped jelly roll quilt for my friend who just moved to Miami. Her birthday is coming up in August, and I thought maybe she could use a little beach quilt. It's also big enough to be a lap quilt if she needs something to cuddle with on the couch. It's about 45 wide x 60 long.

To make the stripes, I just sewed the strips of a jelly roll together and then cut them in to 5 1/2 inch "chunks." Then I sewed 3 of the "chunks" together to make the full strip. I had 2 chunks left over that I think I might use to make someone a pillow later on.

Basting this quilt went so much faster than my Mario Quilt. We didn't have to move the furniture around! But I did have to maneuver around the cats... They just love laying on whatever project I'm working on. Not to mention they like to paw at or bite at the pins. The one pictured here (Sasha) even bit and ripped a piece of tape off of the floor that was holding the backing fabric down! What a mischievous little cat!!

I had lots of different FMQ designs run through my head before I started quilting this one. My top 3 choices were stippling, wavy lines, and loop-de-loops. The loop-de-loops won out because I didn't think stippling would stand out enough and I'm having too much trouble with my walking foot to do the wavy lines right now. I actually really like how it turned out with this FMQ pattern. The loop-de-loops kind of remind me of that bubbly seaweed (thank you Google for helping me find a picture!).


Here's a close-up of the quilting. See what I mean about the seaweed thing? (Maybe that's just all in my head? Either way I like it!) Maybe I'll use this again some day, but there are just so many good quilting designs to try that I don't want to repeat too often!

And now, to end the post, here are some more pictures (for your pure enjoyment) after the quilt came out of the dryer. It turned out so crinkly I just love it! Too bad I'm sending it away!!! :(


Check out that stray string I didn't catch by the binding in this last photo - whoops! I wonder if my friend will notice... (I bet it's not the only one. Haha!)

Happy crafting!!!

July Finishes

Sunday, July 8, 2012

Oops!

Yesterday I spent all day working on the Super Mario quilt again. I think I need between 12-15 more hours to have the whole thing completely done! That is so exciting considering it's been a WiP for about 9 months!

Here's a pic my lovely husband took of me while I was wresting with shifting the quilt. Sorry my eyes look possessed and it's so blurry, but I'm quilting in action with no time to stop for the camera! Stitching in the ditch around all of my characters took a really, really long time. The "Angry Sun" took the longest since it has the most outlying parts. I think I spent an hour just on that one alone. With the quilt being so heavy, it is really hard to move it easily. I've definitely put my little Janome to the test with this quilt!

The fun thing yesterday was that I also started stippling in the blue background part of the quilt. I've never really stippled before, but it is so much fun and I love it! I did some practice squares at the quilt retreat I went to earlier this year, but my stippling wasn't very good. I did some more practice yesterday, and liked what I was doing, so I braved it and went all out on the quilt. I am soooo happy with how it is turning out. I've got about 1/2 of the top stippled and it will probably take another 2 hours to finish the rest. From there it's smooth sailing to the end (I hope)!

Unfortunately, I ran into a little snag yesterday... Just as I was nearing quitting time for the night my left pointer finger got nabbed by the needle! (I've never done that before, so I guess I can cross that life experience off the list!) I was fortunate that it didn't go through the bone and just went through the tip of the finger. It did go through the finger nail, which was not pleasant, but I'll survive. I even got my husband to help me put on a band aid. :) Want to know the best part? I had to go right back to quilting because I wasn't in a good place to stop yet! After checking to make sure I hadn't bled all over the quilt, (phew!) I had about 5 more minutes of stippling before I could call it quits. My finger was howling the whole time, but it's doing better. It's just a little sore now, but I guess this is going to make practicing for my violin lesson on Tuesday a little harder... Oops!

Happy crafting!

Saturday, May 19, 2012

Bunny Baby Blanket

I just finished what I think is the cutest baby quilt I've ever made. The top is made out of large squares of blue fabric with little animals printed on it (it has more than just bunnies, but the bunnies are my favorite...it also includes owls, ducks and mice) and 4-patch squares out of green and yellow flannel for the other blocks.


I was a little hesitant when I started cutting these blocks. I'm so happy I measured twice and cut once! I almost cut the 4-patch squares a 1/4 inch too small (I wasn't counting the extra seam!). So, I'm happy that my brain was telling me that something wasn't quite right with my math and made me calculate again. Too bad that skill didn't kick in in calculus class years ago! :)


The other thing I didn't really plan out was how many squares I would be able to cut out of each fabric. I bought all of the fabric for the top as a fat quarter pack from JoAnn Fabrics. Now, I love JoAnn's, but I've never really gotten great cuts from these pre-made packages. Somehow, I've been blessed enough to make it work each time I've used one. After cutting all of the 5 inch blue squares and 2 3/4 inch yellow and green squares, I realized that I had the exact amount of blue squares that I needed and would have one extra 4-patch. Talk about lucky! The fabric pack came with 5 fabrics, so i decided to use the blue gingham ducky print as a border. That also just barely made it around. I think I have 1 piece of that fabric (about 1 inch x 2 1/2 inches) left. I cut the border strip to 2 1/2 inches wide so it would be 2 inches finished.

For the backing, I made my first ever pieced back! I had some blue and yellow zoo animal prints left over from a baby quilt I made for my godson about 4 years ago. (I can't believe he's 3 already!) I cut big 8 inch squares out of a blue giraffe print and a yellow elephant print. I sewed those together and strung them down the center of the back. Then, I had just enough plain blue and yellow busy print to make the sides of the back. It took a little patience to get it all together, but I love the feel of it. The whole quilt is super soft with all of the flannel and will be really warm and cuddly. I love that there are different categories of animals depending on which side of the quilt you're looking at. I also like that the back is pieced, so if the baby pukes (or does anything else) on the front, you can flip it over and the back will still look cute. :)

My mother-in-law told me that babies really like the feel of satin as well. She said one of her kids loved the satin edge on his baby blanket. After I thought about it, I remembered having a clown blanket that had a red satin edging that I always wanted on my bed. I loved how it felt tucked up under my chin when I was little. So, I figured I'd give it a try on the baby quilt. I really wanted to use 2 inch ribbon, but I could only find 1 1/2 inch or 3 inch ribbon at JoAnn's. So, I decided I would make the 1 1/2 inch ribbon work. I didn't want a huge edge, just enough to be a silky finish. I think it turned out nicely, and the 3 yards of ribbon that came on the spool were just enough! (Again, I should have measured that before I left to go pick up just one spool of ribbon! I'll have to get my act together for the next quilt... maybe...)

For the quilting, I just did a simple diamond pattern through the 4-patch squares. I think it will give the quilt a puffy, soft feel. I was debating between doing a circular doodle all over the quilt, but I compromised and did the diamond pattern and added a loop-de-loop in the border to finish it off. I love my free motion quilting foot!

I'm glad I don't have kids yet, because if I did this quilt would be staying home with me and I'd have to find a replacement gift! Someday my kids will have something this cute. Until then, I'll just give them away to other people. This quilt is for my coworker. He is having his first baby (a boy!) this summer and their baby shower is tomorrow. He is what I would consider a man's man - very in to strong, burly, tough things. So, I wanted something soft for the baby since I think he'll be playing with power tools by the time he's able to hold his head up. :)

Happy crafting!

May Finishes

Thursday, May 17, 2012

Quilt Retreat

I should have posted on this a while ago, but I've been too busy quilting! My mother and I went to a Mother's Day Quilt Retreat in Dodgeville, Wisconsin. It was hosted by Amanda Jean of Crazy Mom Quilts. We had soooo much fun!

I've never FMQ'd before, so it was a real treat to get tips from all of the wonderful women who attended the retreat. There were 11 of us total, so it was a smaller group and we all had a lot of fun together. We started off with a show and tell portion of the weekend where I got to show off my unfinished Mario quilt. The real treat though was seeing all of the fantastic quilts made by all of the other women. Their creativity astounds me! Even my mom had an awesome quilt that I didn't even know she'd made! I've really been inspired to step out of my comfort zone of squares and 9-patch quilts. Maybe someday I'll branch out. (My next quilt will be a baby quilt with a 4 patch pattern... old habits die hard!)

So, at the retreat we were taught how to use our walking foot and our free motion/darning foot. I think they will both be permanent residents on my sewing machine. I used to use my zig-zag presser foot for everything, but now I think I'm going to use my walking foot. I just love the way the fabric glides through the machine! :)

So, without further ado - here's the quilting that I did on my favorite blocks:

I used to draw this heart doodle all the time in high school. I never knew it would really come in handy!

I really liked the look of the stars and loops, so I copied it from a handout Amanda Jean gave us at the retreat.
I liked my pebbles so much I took a picture of both the black and the white sides of the quilt.


And, then here is a picture of the flowers I made. I wanted them to look really sketchy, so I think they turned out the way I wanted them to. :)


And, here's the entire quilt:


We used a quilt-as-you-go method which I think I'll use again and again. It was much easier than I thought it was going to be, so I'm really glad I went on the retreat to learn something new. My quilt is going to be our picnic/4th of July fireworks quilt. I can't want to show it off this summer! But, I think this method of piecing would make a great picnic blanket and also throw quilt. It was a lot of hand stitching, but now that it's all done, I really love it. So - thanks to all of the women who came to the retreat to make it such a blast! I'm looking forward to seeing all of your finished quilts soon! Happy crafting!


May Finishes
Related Posts Plugin for WordPress, Blogger...