Showing posts with label Red White Blue. Show all posts

Friday, July 6, 2012

June Package Pals

Last month I signed up for June Package Pals through C.R.A.F.T. We were given the name and email of another person who had signed up and were asked to send them a little crafty package by the end of the month. My partner and I got to know each other a little and then we were supposed to put together a little crafty package to send to them by the end of the month through emailing back and forth. I sent my package off a little over a week ago, so I think my partner should have received her package by now, and I should be safe to post about it.

My partner told me that she likes to paint and has done some cross stitch and that she's interested in trying just about everything. But she's also had some health complications which makes things hard for her. So, I tried to put together a little package that would include some things she could use as supplies and some things she could use in their final state. So, here's what I put together:

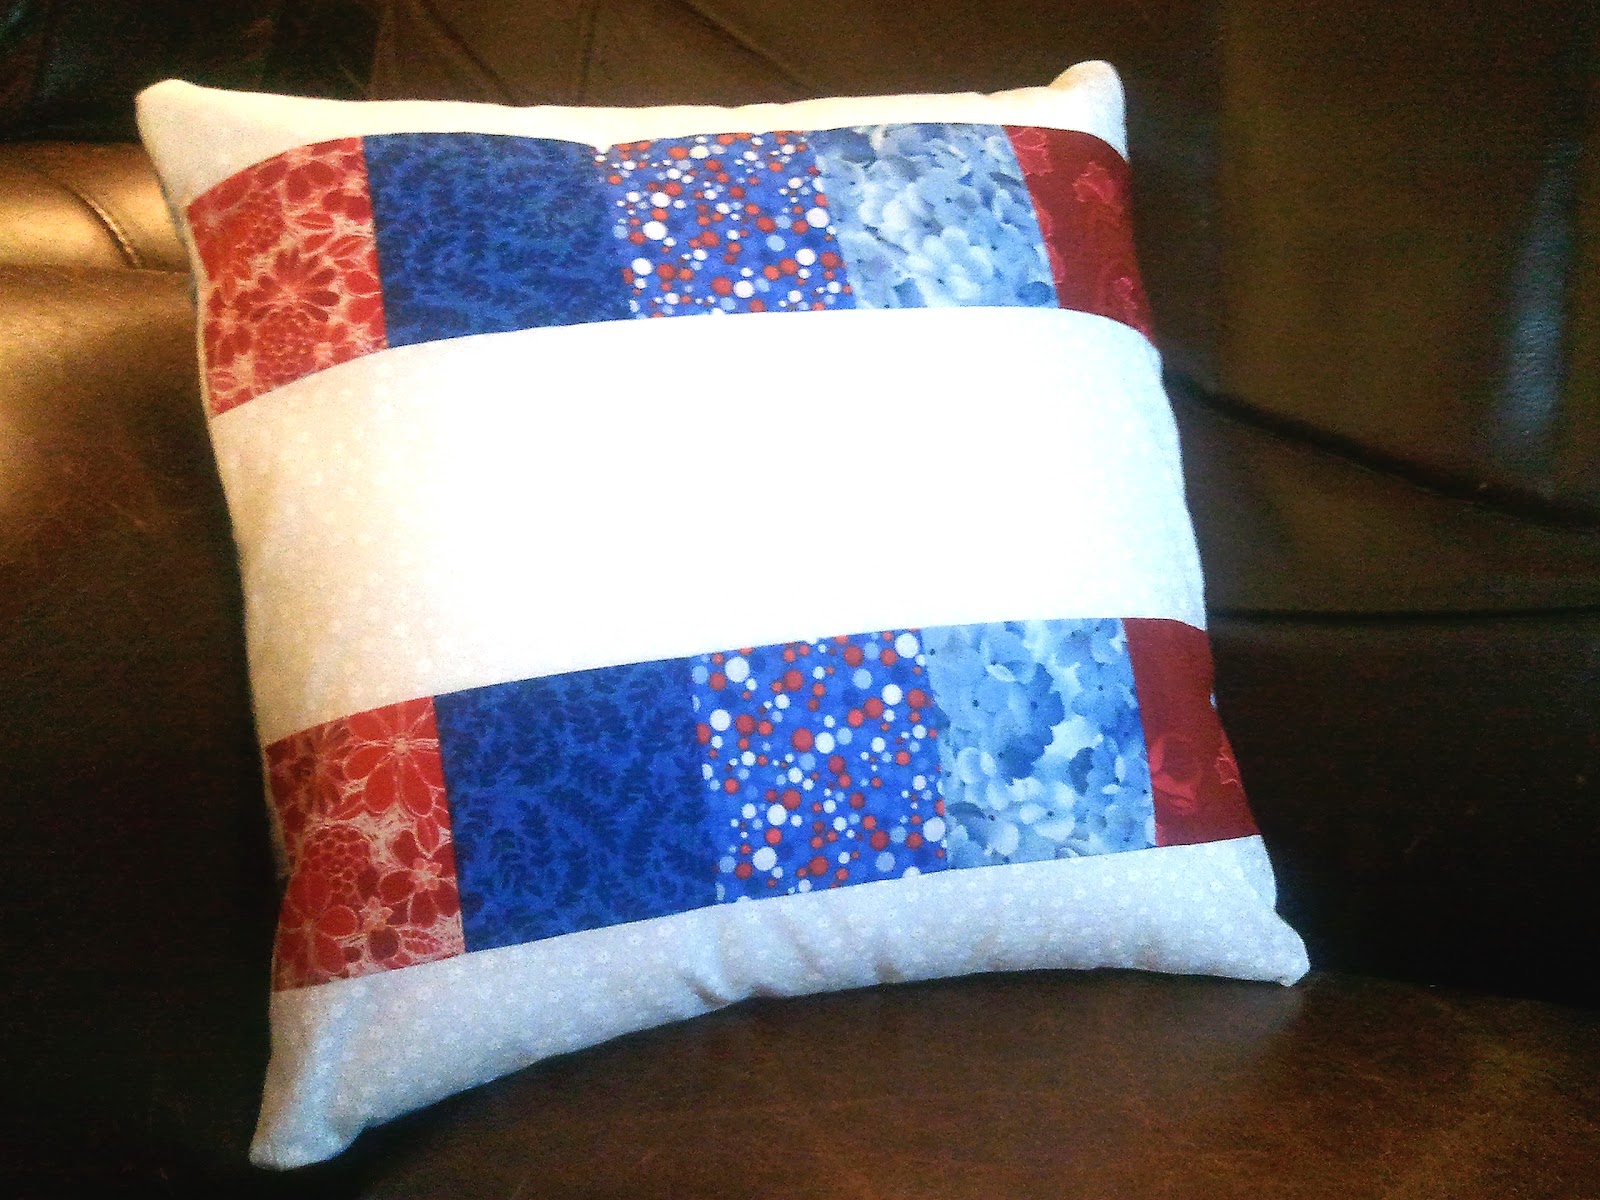
The pillow probably looks familiar to some of you since I used the block in the Red, White and Blue Blog Hop. (For that post and my giveaway, click here.)

The yellow fabric is actually a homemade heating pad. It can also double for a cooling pad, so you put it in the microwave or the freezer depending on how you want to use it. I filled it with rice so that it would keep the heat/cool but also mold around wherever you're using it.

Some supplies I included were 5 colors of embroidery thread and an embroidery hoop. I also gave her three ceramic heart-shaped buttons that I found at an estate sale.

The last 3 things all go together. I put together some blank coasters made from tiles and felt on the bottom. Since she likes to paint, the little note on the top says that she can decorate them however she wants and then to finish them off she just needs to cover them in a couple layers of Mod Podge with the sponge brushes. I hope she has fun with them!

So, I hope she enjoys what I put together. I think C.R.A.F.T. will be hosting another Package Pals sign up for August (to be announced some time in July I believe), so if you want to participate next time, sign up for that blog and keep an eye out for her post. She only takes the first 100 people to sign up, but it's a lot of fun! Happy crafting!

Thursday, July 5, 2012

Spiral Tutorial

I received a couple requests for a tutorial of my second block from the hop - the spiral block. It's not too complicated of a block, but I'll give you all of the measurements for things and how much to cut and how to sew it all together. I hope you all enjoy the tutorial, and if you're looking for my original post about the hop you can find that here.

Supplies needed:
* 8 different fabrics for the front - a fat quarter of each will yield several blocks
* backing fabric
* binding fabric
* items to cut your fabrics
* items to sew your fabrics together

Directions:

Step 1: Selecting your fabric and planning your block
I wanted my block to feel like it was flowing smoothly between all of the colors. So, I wanted you to look at the red fabric and then have it slowly transition into the blue fabric and then slowly transition into the white fabric. If you look at this picture you'll see that I have a couple fabrics with all three colors (red, white and blue), I have a couple that are only red and white or only blue and white, and I have a couple that are just red or just blue. Then I laid them out so that they would be in this order:
                             1) white with red and blue accents
                             2) white with red accents
                             3) red with white accents
                             4) red
                             5) blue with red and white accents (I wanted this one to be evenly
                                 both red and blue with some white, but I couldn't find a fabric
                                 to get this perfectly)
                             6) blue
                             7) blue with white accents
                             8) white with blue accents

Step 2: Cutting
Once you've got you fabric pre-washed (if desired) and ironed, you're ready to cut! I figured out that I needed 9 triangles for each color. The finished half square triangles need to be 2.5" x 2.5" in order to get a 12.5" block. I am still a little bit afraid of putting HSTs together the wrong way or cutting things too small, etc, so I cut the fabric into 3 inch wide strips and then cut five 3-inch squares for each color. Once you have your squares, cut them all in half on the diagonal. This will give you 10 triangles of each color. (Save the extras, we'll use them on the back!)

Step 3: Lay out your block and start sewing
This is what your block will look like when you have all of the triangles laid out the way you want them.
Sew them together, square by square, on the stretchy diagonal side of the triangles, right sides together. They'll look like this once they are sewn together into squares. :)
At this point you should iron each square and then square them up to be 2.5"x2.5".

Step 4: Sew together the block
Sew each row together. I pinned each time I sewed a new pair together to try to keep things lined up. It means less seam ripping later - which is always good! Once you have all of the rows sewn together, you need to iron again. I ironed all of the seams to the right for the first row, then to the left for the second row, to the right for the third row - so on and so forth.

When you sew the rows together, you can line up the seams perfectly because you've ironed them in different directions. I pinned each seam before I sewed the rows together to make sure everything stayed in place. This helps all of your points turn out! :) I didn't get all of mine perfectly, but I came pretty close. When it's all sewn together, then you can square it up to 12.5"x12.5" and it will look something like this:

Step 5: Finishing the block
If you want to finish your block off the way I did, then keep following along. Otherwise, have fun turning your block into whatever you want it to be. :)

I used the left over triangles to mirror the very center of the front of the block and put them in the very center of the back of the block. I bordered this out in a festive fireworks print and squared it up to 13"x13". This gave me a little room in case things shifted while I was quilting them. The border is 5 3/4 inches on all sides of the middle block. When you sandwich the pieces together, you'll have to eyeball lining up the middle of the back with the middle of the front. If you use thin enough batting then you will probably be able to line them up by feeling where the seams are.

For the quilting, I used my walking foot and stitched 1/4 inch away from the edge of each spiral arm on all sides of the arm. I used white thread so it shows up in some blocks and doesn't in others. This stitching pattern then showed up on the back, so you could see the spiral motion on either side. :)


For the binding, I used a red, white and blue striped fabric. I cut the binding to 2.5" strips - I think it took 2 strips to go all the way around the block. Once I had that sewn together into a long strip, I folded it over on itself and ironed it down. Then i sewed it to the front of the block, (mitering the corners) turned it over and whip stitched it to the back. Voila! You're done! :)

So, let me know if you have questions, and I'll do my best to answer them. I haven't had much practice putting together tutorials that people can follow along, so I'm happy to clear up any misunderstandings or goofy wording. Happy crafting! :)

Thanks!

Thank you to everyone for all of the lovely comments about my blocks. If you're looking for my post about the Red, White & Blue blog hop or my giveaway, you can find that here.

For the whole schedule, please click visit Jane's blog here.  Otherwise, here's a list of the bloggers posting for today:


Go cheer on your favorites! Happy summer everyone!!


Tuesday, July 3, 2012

Red, White & Blue!

Happy Fourth of July! Thanks for stopping by my blog. Feel free to take some time, look around and make yourself at home! I hope you have set aside at least 5 or 10 minutes (or maybe even an hour) in between the parades, cookouts and firework shows of today to stop by all of the wonderful blogs participating in the blog hop. This is my first hop and I'm super excited to be a part of all of the fun! The full schedule can be found here with Jane. I'm sharing my day with these awesome bloggers:


I've put together three 12.5 inch blocks for this hop. I hope you like them! These are all of the fabrics I used throughout the 3 blocks. I did add in some white fabrics as well which are not pictured here. 

My favorite fabric is the light blue flowers. It was so pretty and really felt nice. I just bought it as a fat quarter, but now I wish I had more of it. 

Anyway, without further ado, here are my blocks!

Block #1:

This first one is pretty basic - the next two are much more creative. My mom would probably consider this one modern, but it's just strip pieced and went together very quickly. When you get to the bottom of the post, you'll see what this block turned in to. I just like how clean it is. I messed up a little on the measuring, so I had to add the extra 3/4 inch of white on the sides. It worked out nicely though because it added a great edge to the finished project. I might even purposely do this next time!

Block #2:

This block might be my favorite. I've never really liked HSTs, but I've definitely gotten over my fear dislike of them now! I actually cut each triangle separately for this block and sewed them all together on the stretchy bias. (I won't be doing that again...) I designed this block on some graph paper in the hopes that it would kind of look like a firework. I love the spiral motion of it. Sorry for the string tails in the pic, but for some reason I only took one photo of the finished block before I finished it off. To see what this block turned in to, continue reading to the end of the post!

Block #3:

And finally, this is my last block. This one was the most fun to make. Again, I used a ton of HSTs - 216 triangles made into 108 squares. They finish at 1 inch square, so they were a little pesky, but I whipped them into shape. I didn't even do too poorly on the points! I did have some time with my seam ripper on this block, but it wasn't too bad. :) This is also the first block I've ever done any type of applique on. I'm not sure if this really even counts as "applique" since I just stitched near the edge on each star and didn't give them a nice finished edge. (Is that considered or known as something else? Feel free to let me know!) I really wanted the them to have a scrappy look, so this way they'll fray a little bit as the piece gets older. Are you curious to see what I turned this in to? Scroll down to see how it's being used!

Oh, I almost forgot - a GIVEAWAY
I thought I should kick off my first blog hop with my first giveaway! 
Up for grabs are these fat quarters:

There's one black, one tan with gold and brown flecks, one green with geometric suns, one "I love cats" bright green print, one turquoise floral and one maroon geometric circle print.

To enter, just leave me a comment below (and make sure that I have easy access to your email to notify you if you win!). I only have 7 followers, including myself, so the odds are in your favor! I'll accept comments through July 12th until 11:59pm - verified by the time stamp left on my blog. Anyone after that time will be too late for the giveaway, but you're still welcome to comment later on. I'll pick the winner the next day (my birthday!) Friday, July 13th by drawing the number of the comment out of a hat. I'll notify the winner by email. The giveaway is open internationally, so everyone's welcome to join in!


Now, as promised, here's how I put all three blocks to good use!


Basic block #1 turned into a 12 inch throw pillow. I gave this pillow away to a "Package Pal" along with some other goodies. I'll post about that later on in the month, so come back and see what else I sent along. I gave it an envelope backing so the recipient can easily take out the pillow form and wash the case. I used my favorite blue floral fabric on the back since it both looks and feels great! Now I'm starting to think I need to make a new case for all of the pillows on our couch. We have at least 7, maybe more, all in fall colors, and I think they need a face lift. I probably won't cover them in red, white and blue, but this may be another project to add to my ever-growing list of to-dos.


Block #2 turned into a 12 inch trivet/pot holder/table centerpiece. I gave it a double thickness of batting, and quilted around the edges of each spiral arm. I thought I'd use it while camping as a pot holder since kettles and pots over a fire are usually very large and get super hot very quickly. I can also use it as a trivet on my table under a casserole dish or a larger pot.

It also works great as a little centerpiece. I don't have a very large table, so it fits perfectly and holds my napkins, salt and pepper very nicely.


Block #3 turned into a decoration for my apartment's front door. I needed to get rid of the wintery-looking wreath out there anyway, so this was a great excuse to change it up! I made the hanger out of ribbon and secured it with pins on the back. I made the star bunting on the bottom out of scrapbook paper and used some quilting thread to secure it to the block. It says "Let Freedom Ring" - one word on each star. I thought I might use this block as a table centerpiece as well, so I didn't want to permanently attach the hanger or the bunting, just in case.

For the quilting, I hand stitched around the stars. (This was my first attempt at hand stitching, and I really need to work on being more consistent!) It took a lot longer than I thought it would, but it was nice to do some handwork. In the stripes, I used my walking foot to echo the zig-zag pattern in the white stripes and left the red stripes all big and puffy. All in all I think it turned out pretty nice!

So, that concludes my stop along the blog hop. Make sure to check out all the rest of the participating blogs and have a great time seeing all of the creativity with red, white and blue! Happy crafting!

July Finishes
Related Posts Plugin for WordPress, Blogger...