Tuesday, August 20, 2013

Swimming in WiPs!


Hello everyone! I've been waiting for a microwave installer guy to show up all afternoon. Since I couldn't leave the house, I had a lot of time to get some sewing and crafting done!

I have several WiPs in the wings that I've been working on. First up is my beach quilt - Bits and Pieces. I had enough to put a 5 inch scrappy border all around it. So, the top is now done. I plan to bind it in black so it will have a skinny border around all of the color to finish it off.


The border looks a little more pastel than it is in real life. Too bad I didn't have any more red or pink from the middle fabrics to use, but I just barely had enough of the other ones to pretty much make it all the way around.

For quilting I think I'm going to do a loopy all over patter in the middle, then do hearts in the black border. I'm not sure what I'm going to do in the scrappy border, maybe just some free-form wavy lines since it will primarily be used at the beach. Maybe I should be really brave and add some feathers to those wavy lines! *Gulp!* I've never done feathers before...

My second project of the day was finishing up some Christmas stockings for my husband and I.


I know it's way far out from Christmas, but these have been on my to-do list since last November. Obviously I fell short from making them last year, so I decided I'd finish them up super early this year. :)


I really love the texture that the diamond quilting gives the stockings. I still need to run them through the wash to get rid of my quilting lines, but I have a few months to do that. ;) Otherwise, they are good to go!

Third, I started a new scarf! The pattern is called Falling Water and it is a free Ravelry download. I had forgotten all about Ravelry until a couple days ago. Then I rediscovered how much time you can really lose while scanning through everything on that site. I decided I should put some of my browsing time to good use and start one of the patterns I had saved months ago.


I really like how it is turning out so far, despite a couple ssk difficulties. :)

Otherwise, I still have a few other quilts on the to-do list that have been hanging out there for.... almost forever (or for a very long time at least)!

The Double Irish Chain:


These squares have been cut for 2(!!) years now and I still haven't done anything with them. I think this one really needs to be the next one on my get-it-done list.

The Fall Leaf Quilt:


I still have over half of the leaves to put together for this one. Again, I have everything cut and ready to go, just need to do the sewing! I think this is number 2 on the list. :) Or maybe number 1... we'll see if I get motivated enough to work on the Double Irish Chain quilt...

The embroidery project/quilt:


I have 5 out of 12 patterns done and I'm working on the 6th. So, Germany, Egypt, France, Italy and Russia are done. Mexico is in the works, and I still have to do China, Japan, India, USA, United Kingdom and Australia. I plan to border these squares out with the colors of each country's flag and then sew them up into a little travel themed quilt.This one isn't a huge rush, just a guilty pleasure project. :)

The Quilty Barn-a-long:


I have 8 out of 12 barns done. I know I'm a few behind. I also want to make a couple more of my tractors before I sash these and sew them up into a top. Again, this is another guilty pleasure project, but I'd like to finish it up sometime soon...

Lastly, it is my month for our quilting bee - Color Bee Shocked. So, I've been getting a lot of Irish Twist blocks back in the mail. Once I get them all back I want to put this one together quickly. I don't want it to sit in my closet for a couple years until I get to it. 


I'm really looking forward to seeing all of the blocks together! :)

So, that's what I'm working on/not working on these days... How about you?

Thursday, August 15, 2013

Bits and Pieces: Beach Quilt

Hello everyone! I've been sewing a bit each morning, so my beach quilt is coming along. I think I'm going to call it "Bits and Pieces" since it's literally made out of bits and pieces of my Over the Rainbow quilt. Here's how it looks right now:


I'm really liking it, even though the points aren't matching up. It's too hard to get them all to be good with the horrible sewing I did on the 9-patch units 13-14 years ago. I'm just going to blame the 8th grade version of me for any mistakes or wonkiness on this quilt - I don't think she'll mind. :)

It still needs to be larger. If I want to use it at the beach I'll want to lay down on it, or at least sit comfortably. So, I'm going to be adding another border, but I'm not really sure what fabric to use. I have some left over bits from the colored pieces in the middle, but I'm not sure I have enough to make it all the way around and add the inches that I want to. Maybe I'll have to add 2 more (or more???) borders on this to get it to the size that I want. Time will tell I guess...

Anyway - to finish off the post, here is some cat mischief that happened in the making of this part of the quilt. Enjoy!


Oh, hi Leia! Thanks for helping me keep those pieces down and in order. You're such a good helper!


Wait a minute mom, these pieces need to be rearranged. The seams aren't going to match up! Let me help you...


Just a few more to move and then it will be perfect!


Whew, rearranging these rows is hard work. I'm too tired to do the rest. You'll put it back in order, right mom?

Thanks for all the help, Leia! :-p

Tuesday, August 13, 2013

Recycling

Hello everyone! I'm happy that I have another post for you so soon! Since I haven't had much time for sewing or crafting over the past month and a half I think I'm compensating for it now that I have time during the day.

I've been spending my mornings sewing while it's kind of cloudy and cool here. When I was unpacking my craft and quilt supplies I found the left over bits from my Over the Rainbow quilt. Basically they were a lot of strips ready to be sewn into 9-patch blocks.


So, I sewed up all of those strips into these units - 54 of them. A lot of these seams were pretty off. I had sewn all of the 9-patch rows together when I was 13 and not very experienced. So, I'm not really worrying about things coming out wonky on this quilt. Actually I'm kind of liking the effect.

To make things even more wonky, I decided I wasn't going to just use these as straight up 9-patch blocks. So, I cut them all into quarters diagonally.


And then I grouped them so all the quarters were matched up with other colors and sewed them up into blocks.


As you can see all of the points are kind of wonky. That's because the original seams were off, but I wasn't about to spend the time to pick out all of the seams I sewed together 14 years ago just so my corners would turn out. I'm thinking I'll be using this for a little beach blanket anyway, so it really won't matter. I'm actually liking the wonky bits of this. :)

Here are all 54 blocks quartered, grouped and ready for sewing. I've got 14 of them done so far, so 40 more to go. Originally I squared up all of the 9-patch blocks up to 6 inch blocks. After sewing the quarters together to make the final block, they'll measure 5 1/4 inches square. So, finished they'll be 4 3/4 inches square. I'll have to add some borders to make it big enough for a beach blanket, but I think I'll finally use up all of these bits and pieces from my Over the Rainbow quilt. I really do love recycling! :)


Happy crafting everyone!

Monday, August 12, 2013

Our New House

Hello everyone! I'll warn you now this is going to be a very picture heavy post. :) If you just want to see the little quilted mat that I made, scroll down to the very bottom.

We've just about settled in to our new house in Portland. We still have to unpack some things, hang pictures, put away our clothes (and I need to reorganize my fabrics), but we're getting there! We really like the house we've rented, so here's some pictures of our new place:
The front of our house
The yard
The view from our dining room
Front garden steps
Side patio with grape vines
We have grapes!!


Our office - still needs to be put together yet, but my husband loves being able
to play his guitars at full volume without worrying about neighbors.
Downstairs bathroom - I made that toilet paper holder on the back of the toilet! :)
Repurposed oatmeal container with tissue paper and Mod Podge. My first craft here!
Pool table room - so far it's holding our pictures nicely...
My craft room that still needs a little work - it's also our guest bedroom
Our bedroom
Master bathroom upstairs
Jacuzzi tub! Love the master bathroom!
Stairs where the look over is for the living room. See that skylight window straight ahead?
My other cat (not pictured here), Sasha, decided to jump into that window and then
realized that the ledge isn't straight, but rather slanted down. So, after lots of scrambling
and trying to hold on, she had to jump back over to the ledge. Gave me a little scare!
Living room
Living room from above
Dining room - those roses are from our garden!
Kitchen

So, that's the tour of our house. I tried to rearrange the pictures so they were in a better order, but Blogger isn't cooperating with me right now. Oh well! So, besides the toilet paper holder that I did, I also made a little food mat for our cats.

When we packed everything up in Madison I threw away their old food rug because it was just really old and messy and stained. I didn't like putting it into the wash because it was backed with rubber and would get all these little rubber bits into everything. Yuck! So, when I was unpacking the craft room I found my left over fish from the charity quilts I made earlier this year. I had 8 of them, so I made a little food mat. It went together in a couple hours yesterday evening.


I quilted it with some relaxed wavy lines and backed it in the same rainbow fabric I used for some of the fish. I love this because I can throw it into the wash whenever I want and it will keep the indoor/outdoor carpet of the pool table room from getting dirty with cat food messes. 


My cat Sasha also approves of the little mat. I think she's looking for more soft food though... :) She'll just have to wait until tomorrow! 

So, thanks for putting up with the huge picture heavy post. Hopefully I'll get more into crafting and quilting stuff as we get situated here in Portland. I'd like to make us a light weight quilt/blanket for the beach and a beach tote bag, but those might have to wait until I get some more WIPs out of the way! Happy crafting everyone!

Friday, August 2, 2013

Our Last Days in Wisconsin

Hello everyone! I apologize for not posting at all in July. I have been going nonstop this month because tomorrow will be driving across the country to move to Portland. So, it was an insane month, but here's what I've been up to in case you were missing me. :)

We celebrated the 4th if July with several cookouts and firework displays. I'm sure you had several of your own as well. We could even see some from our apartment balcony! Too bad we figured that out on the last year we are here. We also had a fun appetizer and wine night with some of my husband's family. We made way too much food, but I guess that's all part of the fun!

I had my last day of work on July 12th. My coworkers were all really lovely and had a cookout/going away party for me. :) It was a nice time. (It is still sinking in yet that I don't have a job!)

That same afternoon my husband and I went camping with some friends of ours for the weekend. July 13th is my birthday and one of our friends' birthday was earlier in the week, so we had a double celebration. If you've never used a pudgy pie maker for grilled Reuben sandwiches, you are missing out! We went on a canoe ride where I almost put us into the main drag of the Mississippi river (always follow the signs for the canoe route !!). We were also eaten alive by mosquitoes. I had 54 bites on just my left foot, but not too many anywhere else. Our friend had it worse since each bite she got gave her a softball sized welt! Yikes! Anyway, the weekend was fun.

I went to my last Farmer's market here in Madison with my family. We even got to go up on the observation deck of the state capital which I haven't done before. It was a beautiful day!

We also had our last night at the Memorial Union on the campus of the University of Wisconsin - Madison. It's and old hang out and just beautiful. There was live music, good beer and great company.

We took a little trip to see my Aunt and Uncle in Michigan. We got some great fresh blueberries and went on a winery tour in between family time. Had to see people one last time before we're 2,500 miles away!


I did a ton of packing when we got back. I had several times when the kitties really wanted to help me pack as well. We had lots of time to go through things but it seemed like it was still a mad dash at the end to load up the truck.

In between all of that, I haven't had too much time for sewing, but I gave worked on a couple small projects. I've gotten more of my international embroidery blocks done. Unfortunately the pattern spelled Egypt as "Egpyt" so I had to flub a fix on that block. I think it will work OK now and I'll post a shot once I finish up the France block on the road.

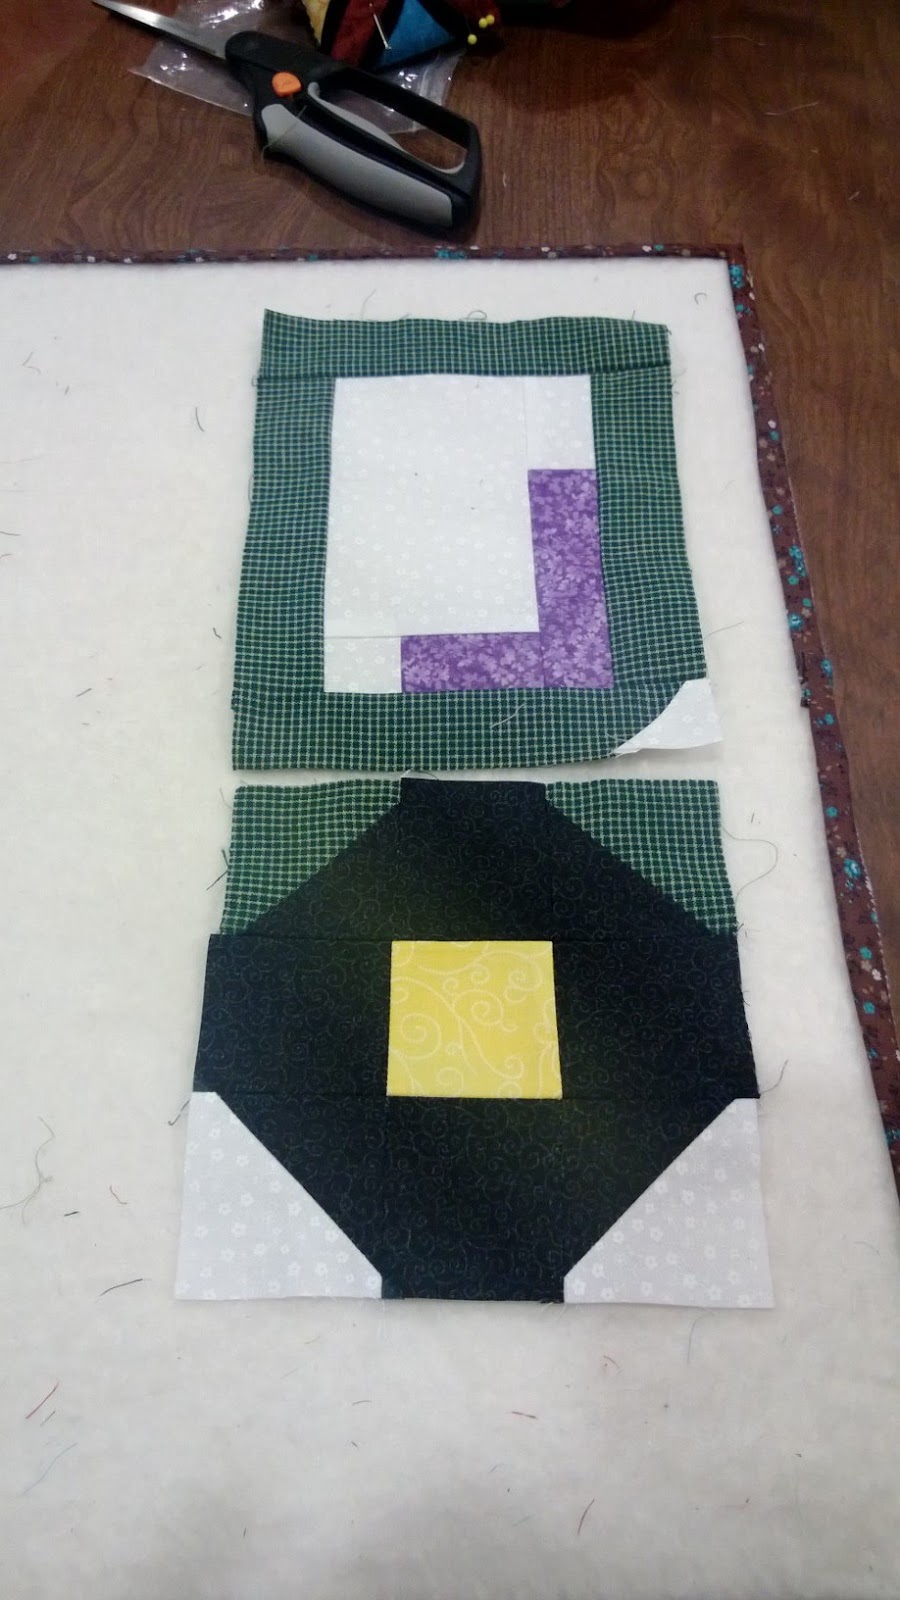
It is also my month in August to be queen bee in the Color Bee Shocked group. I chose to stay kind of traditional with the block I am asking everyone to make. It is an Irish Celtic Twist block. I even got to go and pick out new green fabric for it! Then I cut it all up and sent that out to everyone so that my move wouldn't delay the process.


So, sorry for the lengthy post of rambling, but I wanted to check in with everybody. :) I hope you have all had a great summer so far. I'll catch ya next time from the pacific northwest!! Happy crafting!

Friday, June 21, 2013

Summer Is Here!

Hello everyone! After having such a long and snowy winter we finally made it to summer! I wasn't sure it would ever get here since spring was pretty cold here too. This weekend it is supposed to be really hot, and today we are getting severe thunderstorms. I just hope the hail and tornadoes stay away!

So, that means I should stay inside and sew this weekend. I did just finish up another kindle case since now I have a small kindle instead of the one with the huge keyboard at the bottom.


Now I'll have something pretty to carry around with me and my kindle won't get all scratched up! :)

I have several other projects going on right now too, but what I really need to do is figure out what pattern I'm going to use for my bee month. I host August and since we'll be moving at the end of July I'll have to get my act together early. Any suggestions? I'm thinking I might design my own block and put up a tutorial... We'll see if I have time for that I guess.

Anyway, I do have a little finish to share today. I have finished my June bee block.


It was the first time I've had to do real paper piecing, and I was kind of nervous since I had to make this for someone else! I think it turned out OK though. The middle isn't quite on, but I'm happy with it. And, I only had to rip one seam! I'd say that's a win! :)

So, what are you all working on this summer?

Sunday, June 16, 2013

Tractor Block Tutorial and Quilty Barns Update

Hello everyone! This weekend I was working on my Quilty-Barn-Along blocks and was thinking it could really use a tractor with all of those barns. So, I sat down with my graph paper and started designing this:

I love this tractor so much! It's the same dimensions as the barns (14.5" x 14.5" without sashing) so it will fit nicely in with my quilt. I also added a little quilt block to the side of the tractor so it can join in the fun as well. The little quilt block is a 4.5 inch unfinished block though, so a little smaller than the ones in the barns. I'm just not sure if I'll use the tractor on the front of the quilt or put it on the back. My mom said the place where I put the quilt block would also make a nice space for a quilt label for the back of the quilt. What a smart woman!

So, I thought maybe other people would want to make a tractor block too. If no one else does, then this post will be just for my mom who said she wants to make a whole quilt of tractors. Haha - I think she's a bit biased (quilty pun intended!). :) So, in case you do want to make one, here's a little tutorial:

Ingredients:
For the background (white in my block) you'll want to cut 19 pieces:
(2) 3.5" x 5.5" rectangles (one for the smoke stack, one for the tractor cab)
(10) 1.5" squares (used throughout the block)
(1) 4.5" x 5.5" rectangle (for the smoke stack section)
(1) 1.5" x 2.5" rectangle (for the cab of the tractor)
(1) 1.5" x 6.5" rectangle (for the engine of the tractor)
(2) 2.5" squares (for the large wheel)
(1) 3.5" square (for the small wheel section)
(1) 2.5" x 3.5" rectangle (for the small wheel section)


For the tractor (green in my block) you'll want to cut 11 pieces:
(7) 1.5" x 6.5" rectangles
(2) 1.5"x 4.5" rectangles
(2) 2.5" squares (these will be used when you sew the tires)


For the tires (black and yellow in my block) you'll want to cut 18 pieces:
(8) 2.5" squares in black (large tire)
(8) 1.5" squares in black (small tire)
(1) 2.5" square in yellow (large tire center)
(1) 1.5" square in yellow (small tire center)


For the seat you'll want to cut 2 pieces:
(1) 1.5" x 2.5" rectangle
(1) 1.5" x 4.5" rectangle


For the smokestack you'll want to cut 1 piece:
(1) 1.5" x 4.5" rectangle


For the quilt block, you can make it in 2 different ways:

First Way: Using all half square triangles you can make it with 28 pieces:
(16) 1.5" squares from the background fabric (white in my block)
(12) 1.5" squares from the star fabric (red in my block)


Or Second Way: You can use larger pieces and you'll want to cut 21 pieces:
Background:
(1) 2.5" square (cross word puzzle print)
(4) 2.5" x 1.5" rectangles (black fabric)
(4) 1.5" squares (blue fabric)
Star fabric (red in my block):
(12) 1.5" squares


In my completed tractor block I used all half square triangles and 1.5" pieces because I had several of these left over from my quilty barns already. But, you'll will have less seams and be more accurate if you use the larger pieces instead. I just wanted to recycle all of those tiny pieces that I had left over. Anyway, back to the tutorial!

Here's a picture of the sketched out design which might also help you visually:


Once you have all of your pieces cut out you're ready to sew it all together. I started with the star block since it has the most tiny pieces to keep track of.

If you're using all 1.5" squares, pair up a star square to a background square and sew on the diagonal across the squares from corner to corner. This is Lori Holt's easy half square triangle method. Then cut 1/4 inch away from the seam and press open to get a total of 12 half square triangle blocks. Lay them out with the left over background blocks like this:


Then sew them into rows and press the seams open. Then sew the rows into the square block and press those seams open to get this:


If you're using the larger pieces for the star here's what you'll do. 

1. Take your 2.5 inch square background piece and lay a 1.5 inch star piece over the corner. Sew across the small piece from corner to corner diagonally. Trim cut 1/4 inch away from the seam and press toward the corner. This again uses a tip from Lori Holt - her easy corners method. Repeat this on all 4 corners of the 2.5 inch piece to get the center of the star block. 


2. For each 1.5" x 2.5" background rectangle, you'll pair it up with (2) 1.5" star squares. You'll use the same technique you would for step one, but you only have 2 corners to do instead of 4. Trim 1/4 inch away from the seam and press toward the star block pieces.

3. Lay out your block like this 


and then sew the rows together and then sew the rows into the block. Press seams open where you can to reduce bulk and you're done!


This way was faster and easier than all of the half square triangles, so it just depends on what pieces you want to use. :)

OK, now you're ready to assemble the tractor!

I started with the wheels and went from large to small. Lay out your pieces like this:

Large Wheel with 2.5 inch pieces
Small Wheel with 1.5 inch pieces
Then you're going to sew them together. The four corner squares will be made into easy half square triangles. Pair them up right sides together, sew on the diagonal across the square, trim 1/4 inch away from the seam and press toward the background fabric. 

Once that's done, you'll sew them into rows, and then sew the rows into a block. It will look like a snowball block. :) And now you have two tires!


Next I put together the cab of the tractor. For this I started with assembling the pieces of the seat and the bottom piece of tractor under the seat. Lay out your pieces like this so you know where everything goes:


You'll use (4) of the 1.5" x 6.5" tractor pieces, (2) 1.5" background squares, a 3.5" x 5.5" background pieces and the pieces for the seat.

Sew the background pieces to each piece of seat like below. Then sew an easy corner triangle onto that bottom piece of the tractor. Make sure your triangle goes the right way! You want it to be on the bottom right hand side.


Then you're going to sew all of these pieces together to make the cab. Sew seat bottom the large background fabric piece and press. Then sew on the seat back and press. Then sew the sides of the tractor cab on and press. Then sew on the top and bottom.


From here you're ready to put together the cab and the large wheel. Put right sides together and sew the cab and large, back wheel together. Press and set those pieces aside for later.


Now you're ready to make the front end of the tractor. I started with the smokestack piece. Lay out your pieces like this:


You're going to sew one 1.5 inch square on as an easy corner to the top of the smokestack rectangle. Make sure it's pointing the right way, otherwise your tractor driver will get a face full of engine exhaust and that's never good! :) You want the background triangle to be on the top left hand corner of the smoke stack.

Press and sew on the second 1.5 inch square to the top of the smoke stack. Press. You'll have the 3.5" x 5.5" piece of background fabric on the left side of the smoke stack and the 4.5" x 5.5" background piece on the right side of the smoke stack. More space between the driver and that smoke stack. ;) Press and set aside for now.


Now you're ready to make the engine part! This was my favorite. :) Lay out your pieces like this:


You'll make those two small background squares into easy corners on that 1.5" x 6.5" piece of tractor fabric. Like this:


Then sew a 1.5" x 4.5" piece of tractor fabric to the left and right sides of your quilt block. Press. Then sew on a 1.5" x 6.5" piece of tractor fabric to the top and bottom sides of your quilt block. Press. Then sew on the front piece of the tractor, then sew on the 1.5" x 6.5" piece of background fabric to the front. Press this piece and set aside for now.

Now you can get the small wheel ready for action. Lay out your pieces like this:


Now sew those together in a row. You'll have the 2.5" x 3.5" piece of background fabric on the left of the wheel and the 3.5" square on the right side of the wheel. Press.

Now you can sew all of the front end pieces together! :) Lay them out like this:


Now sew them together and pin where you feel it's needed. Press.

Now you can sew the front to the back and have a completed tractor!


At this point it should measure 14.5" x 14.5". I added an embroidered steering wheel to my cab as well:


So, there you have it! A quilty tractor to go along with your quilty barns! :) My mom also said it would be neat to have a large 4.5 inch square of crop fabric (like corn or wheat) instead of the quilt block on the side. She's just full of good ideas. :) If you make one, I'd love to see what it looks like!


And just for fun, here's a picture of it with all of my barns so far. I'm really enjoying this project, so thanks so much to Lori Holt for getting us all going!! Happy quilting everyone!


P.S. I'm not perfect, so if you find something wrong with this tutorial, just let me know! :)
Related Posts Plugin for WordPress, Blogger...