Showing posts with label Wreath. Show all posts

Thursday, August 9, 2012

Tie Wreath Tutorial

I've finished another of my crafty August 2012 goals. I've put together the tie wreath for my father. This is a no sew project too! So, this was such a quick and easy project I might as well do a tutorial for it, right? There are several versions of this floating around on the web, so I don't know how many I looked at before I gave this a try. I thought it would be a lot harder than it actually turned out to be, so I'm very happy I gave it a shot. I know my husband has quite a few ugly ties that I might make into another one for our door, but we'll see. Here's what you'll need to do to put one of these together for yourself...

Ingredients:
15 ties in the colors of your choosing
About 50 straight pins
One 12 inch Styrofoam wreath form
3-4 inches ribbon for hanging the wreath

Directions:
1) Lay out the ties in the order you want to add them to the wreath. This will allow you to check the color transitions before you start putting them on the wreath. Once they're on the wreath it is a bit of a pain to change them around. Set aside one special tie to make a bow for the wreath.

I added a couple ties to my wreath layout after taking this picture. I used 14 ties to wrap around the wreath and set aside one of my grandfather's old silk ties for the ribbon.


2) Take a tie and pin the small end of the tie to the back of the wreath form. Wrap the tie around the wreath form until it hangs over the edge by about 2-3 inches. Pin in place through the top of the tie.


3) Take another tie and pin its small end to the back of the wreath form about 1 inch away from the middle of the wrapped tie next to it. This will ensure that all of the areas are covered and that the ties will overlap as they get wrapped. Wrap the tie around the wreath form and pin in place through the top of the tie.


4) Repeat steps 2 and 3 until entire wreath form is covered.


5) Pin inside the tie as shown in the picture. If you want you can secure the tie toward the center of the fat end and toward the sides to keep everything in place. Once the tie is pinned inside, then you can remove the pin from showing on the outside on the top of the tie. Repeat this step until all ties are secured and no pins are showing on the front of the wreath.


 6) Tie the last remaining tie into a bow. Determine where on the wreath you want it to be and secure it with pins behind the knot of the bow.

7) Fold ribbon in half and pin ends together onto the back of the top of the wreath.

8) Hang on a nail or hook on your door and you're all done! :)

Saturday, February 4, 2012

Valentine's Yarn Wreath

Today I thought I would try my hand at a yarn wreath. I've always liked how these look and my sister is having a housewarming party, so I'm going to give her the first one as a housewarming present. I think it turned out quite well, but my husband doesn't think it has enough "stuff" on it. He thinks the whole wreath needs to be covered in flowers for it to look like a wreath. I showed him other examples of it online and his response was, "oh" - so I guess that means he's OK with it. Oh well, because I plan to make one for our door too!

So, I started off with a Styrofoam wreath form and wrapped it tightly in red, gray and white yarn. This took about 90 minutes to do since I started and stopped with different colors of yarn. I also didn't wrap the wreath form with anything underneath the yarn, so I had to make sure I was wrapping tightly enough so that none of the Styrofoam would show through.

Then I cut out circles in red, light pink, white and black felt to make the felt roses. I made a few larger ones and mostly small ones for an accent.  I found that if you roll them like I show in the picture - on the top of the felt toward the center instead of underneath - they open up more like roses and the petals look a little more natural. Then you can glue the very center of the spiral to the bottom to make it all stick together well. Once I had them all rolled and put together I glued on the feathers for the background behind the roses. Then I arranged the roses and glued them on.


The last piece was adding a bit of ribbon to hang it on the door. I think for the one I make for our door I'll have the ribbon be a bit longer. I don't know that I like seeing our apartment number through the middle of the wreath. I'll have to play around with it.

I think for the wreath that I keep, I might wrap the entire wreath form in red yarn and then crisscross the white and gray yarn over the red. Maybe it will look a little bit like argyle then. :) I'll probably do the same thing for the roses and feathers since I like it. Anyway, I've seen many of these wreaths around and there's probably a million tutorials for it so I have no idea who to credit for this design. I've seen it too much, so I don't remember where I saw it first. I hope you try it out, because it was a lot of fun to make! Happy crafting!

Saturday, December 10, 2011

Winter Wreath

At first I thought this wreath would come out more Christmas-y, which it does, but I think it will work for the entire Winter season. I found the tutorial here: Enchanted Rose Studio. This creator used more circles than I did, but I liked being able to see more of the text of the book than not.

The book I used was a copy of "The Hobbit" that had fallen apart. I knew I was going to use it for something, and when I saw this blog I knew it was the perfect thing to do! Below are pictures of the steps I took in bringing the finished product to life. I highly suggest taking on this project. It was a lot of fun, is very beautiful when completed, and didn't take that much time to complete. Happy crafting!

Step 1: cut strips from the book pages to cover a wreath form - slightly overlap each strip so that the entire form is covered. The back will be where the edges come together.

Step 2: cut out circles (I used a 3 inch circle) from the book pages. Cover the edges in glue and dip in glitter. I believe the tutorial I shared above used glitter glue, but I liked the look of dry glitter better.  Let these dry before you start to apply them to the wreath form.


Step 3: form the circles into the shape you want to have on your wreath. I used some that had 3 points and some that had 4. Instead of concentrating on the shape of each one I was creating, I just scrunched each piece around the pen, and however it came out was how I put it on the wreath.

 Step 4: Flatten the base of your circular piece so it is easier to glue onto your wreath form. Use hot glue to put it in place on your wreath. I started with the inside first, then went around the outside and then filled in the front of the wreath at the end.

Step 5: Continue placing the circles around the sides and front of the wreath until completely filled in. You don't want to cover the back, otherwise it won't lay flat against the door. Then, secure a ribbon or a hanger of your choice to the back and place on your door or anywhere in your home. I thought about putting a ribbon on the wreath, but I'm not sure it would look right. Maybe I'll have an update in the future...


Saturday, September 10, 2011

Fall Wreath Completed!

My orange slice wreath is finally done!!! I am actually very proud with how it turned out. Here's a picture of how the rest of the orange slices went on. Once all of the slices were on I took the wreath outside and sprayed it with clear, matte, acrylic paint. I'm hoping that will keep it sealed a little bit and deter any bugs from trying to eat it. The oranges slices aren't completely dried out (completely hard) so they are a little tacky. Hopefully this spray will make it last a little longer. I'm still giving this one to my mother-in-law. It will make a nice birthday present for her and give her front door a fall feel.


The paint only took a few minutes to dry since it was really windy outside. I'm glad I used the matte finish instead of glossy. I think if they were all shiny it would have looked like I used fake fruit, and these slices are definitely real! Once the paint was dry I wrapped an orange ribbon with a circle glitter pattern around the wreath. I used the ribbon to cover up any not-so-great-looking orange slices or places that had little white spots showing through. It's still not perfect, but I think it looks better with it wrapped around instead of just as a bow at the top.


Then, I found the spot that I thought looked the worst to put the flower and cinnamon sticks. That way I could really cover them up and instead of people looking at that place because it looked bad, now they'll look at it because that's where the detail is. I just hot-glued the flower and two cinnamon sticks onto the wreath. Then I tied the ribbon in a bow right next to the flower over/around the cinnamon sticks. I had a little more of a ribbon tail on one side that the other. I thought about cutting these to be the same length, but I like it looking a bit lopsided. The detail is off the to side/corner of the wreath anyway, so I kinda like it. You can do whatever you'd like with yours. I tried to put on two flowers, but I just couldn't get the other one to lay right on the wreath, so I canned it. I think it looks pretty good with just the one flower as well. The last thing I did was curl the ribbon tails around my finger so they had some structure instead of just hanging there.

So - my door decor projects are done. If you try this one, I hope you have a blast making it. Just remember to be patient while your orange slices are drying! Happy crafting!

Thursday, September 8, 2011

Halloween Wreath

I know, I know... I am only 2/3 complete with my fall (orange slice) wreath. But, since it is taking me a little longer to complete that one (and since I'm not completely happy with it) I made a Halloween wreath today. I suppose you could keep it up for most of the fall season. I think I'll hang this one up tomorrow - once I get a nail on our front door - and keep it up through Halloween. Then I'll put up the orange slice wreath after that for the Thanksgiving season. I guess that means I'll have to make one for me and one for my mother-in-law after all, but now I'll have some extra time to get them both done!

So, here's what you'll need:
1 Styrofoam wreath form (I used one that was NOT rounded on the edges)
Black ribbon to wrap around the wreath form
Hot glue gun and hot glue sticks
candy corn (I used 1 1/2 large bags but the extra you can always put out to munch on later!)
Ribbon to use to hang the wreath when it's done (or you can use the same black you used underneath)

First, wrap the ribbon around the wreath form in a spiral pattern. I glued the ribbon down each time it wrapped around to the back of the wreath. Since you'll be covering the ribbon with candy, it doesn't matter how well you wrap the ribbon, if it's a little bubbly, or if you can tell where you started and finished.


Once you have your wreath form completely wrapped, then you can start gluing on the candy corn. I started on the front of the wreath on the row that goes along the outer perimeter, or the top row for the front. Once you've gone all the way around, you're ready to start your second row. The candy corn should be pointed in the opposite direction from your first row. This allows you to fit on more candy and have less black ribbon showing through. Here's a picture of the pattern it makes.


Keep going around the wreath form until you've covered the front, outer edge and inner edge. Then flip it over and cover the back side. You'll still be able to see black ribbon in between your candy corn, but I think that makes it look even better. You could really use whatever color of ribbon you'd like. I think black makes it look nice and sharp. Here's a picture with the front and outer edge being completed:


When you're all finished gluing on the candy corn, you're ready to add your hanging ribbon. I just looped mine around once and then tied it off a few inches at the top. I haven't glued it on yet, but I'm not sure I like the purple bat ribbon. It definitely gives it more of a Halloween flair, but I think I might want to change it to use the same black ribbon I had underneath. I think that might make it look more cohesive, albeit it will make it much less "halloweeny."

Anyway, I had fun making this wreath. It only took a couple hours to make. I easily crafted this during the first regular-season Packer game. (They won - Yay, go Pack!) So, if you try this one out: Happy crafting! :)

Monday, September 5, 2011

Fall Wreath Day 2

So, I'm still working on the fall, orange slice wreath. I initially started with 5 sliced oranges, but soon learned that I was going to need many, many, many more. Total count that I think I'll use is 15, but I'm drying a couple extra right now just to be safe. Currently my dehydrator is on it's third batch of oranges, so it's definitely getting a work out this weekend!

Here's a picture of the supplies I'm using:


Those were about half of my first batch of oranges - the thinner slices that dried faster. My second batch of oranges were a little thicker and took about 8.5 hours to dry. My third batch I'm trying to make a little thinner. They are larger oranges, but I think they'll give the wreath a nice finish.

Here's what it looked like after I had given the wreath form it's first "coat":


I decided not to use the ribbon to cover the form. Looking back, maybe I should have, but I only have one roll of ribbon and it wasn't going to cover the whole thing. I didn't want to run all the way out to Hobby Lobby to get another roll of the same type. So, I'm planning on winding it around the outside of the oranges (if I need to cover some bare white spots at all) once the whole thing is covered to my liking. Then I'll eventually wind it around to the place where I'll put the bow. 

Here's how the wreath looks right now:


I have the front and inside pretty well covered. The back and outside edge still need some work. Once the small white gaps are covered then I'll go back around the front and see where I should put some extra oranges just to make it look nicer. Hopefully my next set of oranges will be dried around 9:00 tonight and I'll be able to finish the wreath this evening. I know my original plan was to make two - one for me and one for my mother-in-law - but I'm not sure I'll want to do the whole thing again. Maybe I'll make myself a nice ribbon-covered wreath with some faux fruit, twigs and cinnamon sticks attached instead. Anyway - if you try this project, learn from my mistakes! :) Happy crafting!

Sunday, September 4, 2011

Fall Wreath


I saw this wreath in a holiday magazine last year and I've wanted to make it ever since. I guess it was hung at a little Chateau (You can see the blog for all the different wreaths featured at the Chateau here: Le Petit Chateau Blog Post).

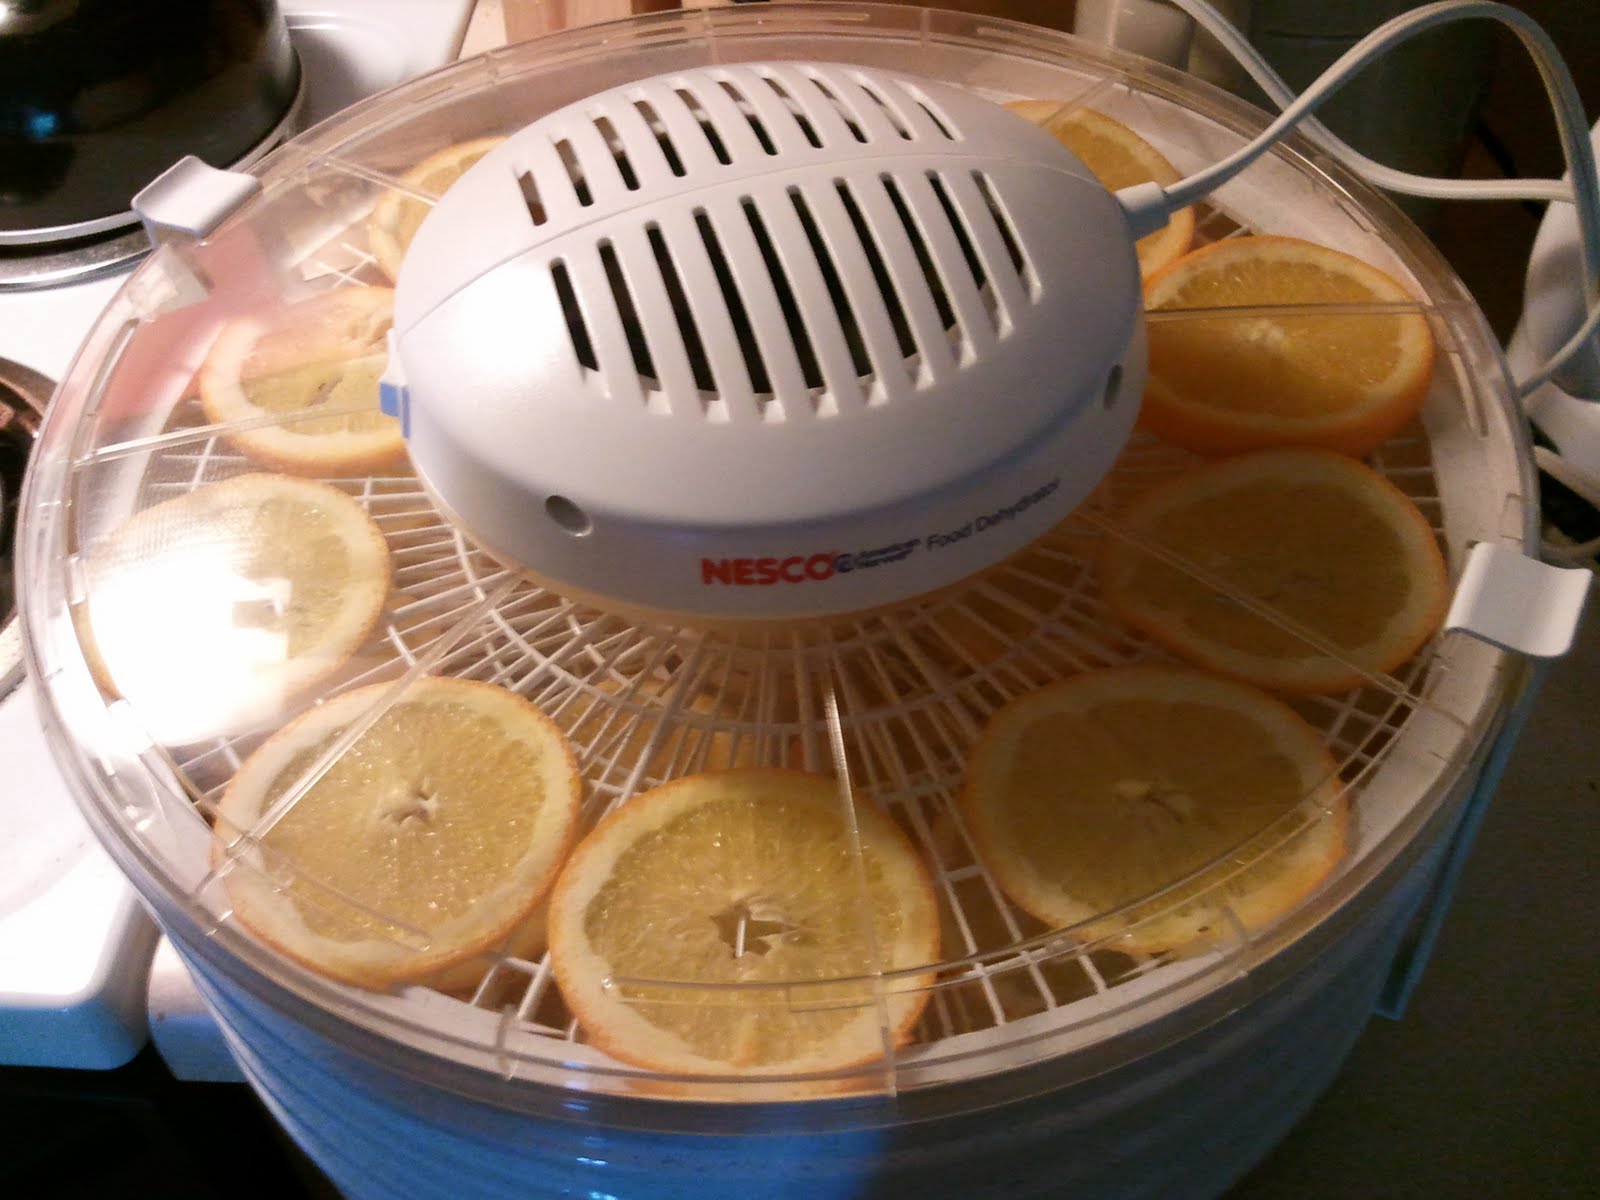
I just got a new Nesco dehydrator specifically for this project. So far the orange slices have been in the machine for about a 1/2 hour and I can already see a difference in the top shelf. I used a mandolin to cut most of the slices to the same size. But, when I had 2 oranges left to slice, I couldn't get the mandolin to work properly any more. So, I had to cut the rest by hand which means they won't all be uniform. I guess this also means that they won't dry at the same rate as the other slices, but I think it will make my wreath look more unique since I'll have some thin slices and some thicker, more chunky ones too. I cut up 5 navel oranges - we'll see if that's enough or if I'll need more...


Once my orange slices are dried, I'm going to spray them with matte, clear acrylic paint to seal them. Then I'll be hot-gluing them around a Styrofoam wreath form I bought at Hobby Lobby. I'm not really sure the best way to cover the form, so I'm just going to wing it and I'll let you know how it turns out. I'm thinking I might cover it with the orange ribbon I bought and then glue the oranges to that. I don't have any evergreen boughs laying around, so I'm going to use some cinnamon sticks, a nylon flower and some pretty orange ribbon for the accent decoration at the top.

I'm really looking forward to hanging this on the front door of our apartment. I think it will be a nice, fall-themed wreath that will add a little color and a little fragrance to our building's hallway. Once I try it out, my mother-in-law would also like one for her door. Her birthday is coming up in a couple of weeks, so this will make a great present. I am super excited to begin the project, so I'll post more once I get it all going! Happy crafting!
Related Posts Plugin for WordPress, Blogger...